KekseKaempfer
A2OC Donor
Today I. replaced my clacky door check strap with a spangly new one. While the door panel was off I decided I'd also change the lock LED to a spangly new one.
Here's how.
You will need
Tools to get the door panel off. Torx bit and screwdriver
Cutters and pliers.
Wire Strippers.
Soldering iron and solder.
Heatshrink tubing and something to shrink it with.
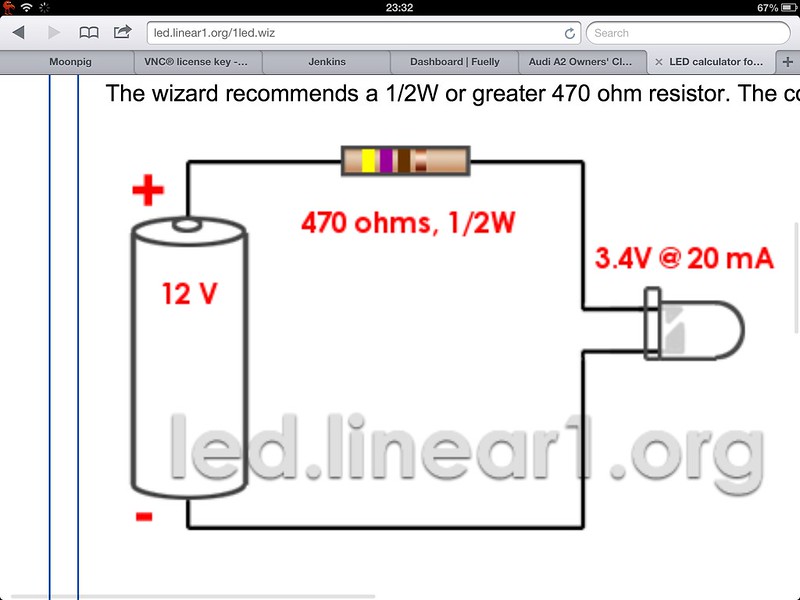
2mm/3mm* LED of your colour choice and appropriate resistor (470R) for 3mm ultra bright*
Stanley knife/scalpel, scriber (or other sharp pointy instrument)
Glue/silicone
You can disconnect the battery if you see fit. I didn't.
Start by removing the door panel as described here:
http://www.a2oc.net/forum/showthrea...ear-car-door-interior-panel&p=56838#post56838 (Rear is the example, but the procedure for the front is pretty much the same)
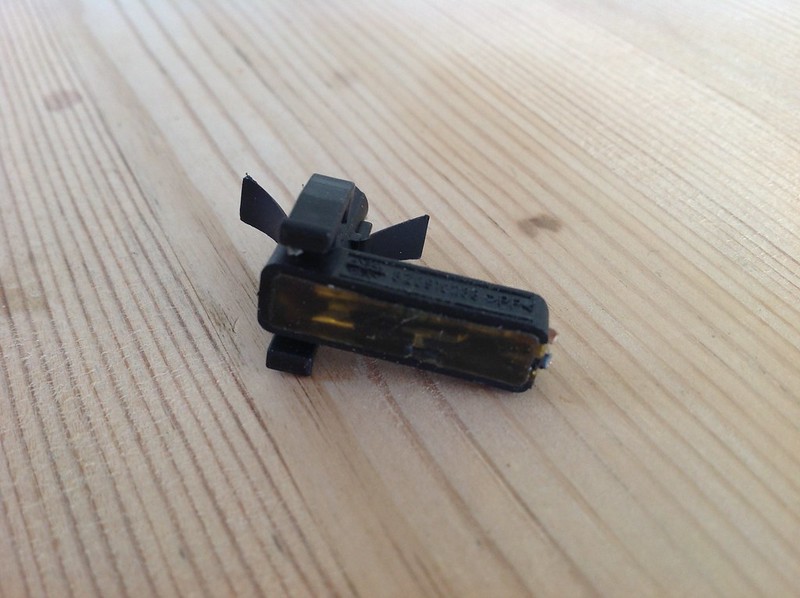
Once it is free, find the door panel LED on the top. Squeeze in the tabs and remove it.
Be brave. Cut that puppy off as close to the LED as possible. Leave as much wire in the car as you can.
At this point you can prepare the ends of the wires in the car loom now by stripping back and tinning with fresh solder ready for reconnecting the new LED.
Go indoors. It's cold out.
Look at the LED It's a black plastic moulding the underside of which is filled with a glue type gunk.
At this point you can just give up with this and solder your new LED on to the wires in the car and stick it in to the door card. But trust me this next bit is worth the effort.
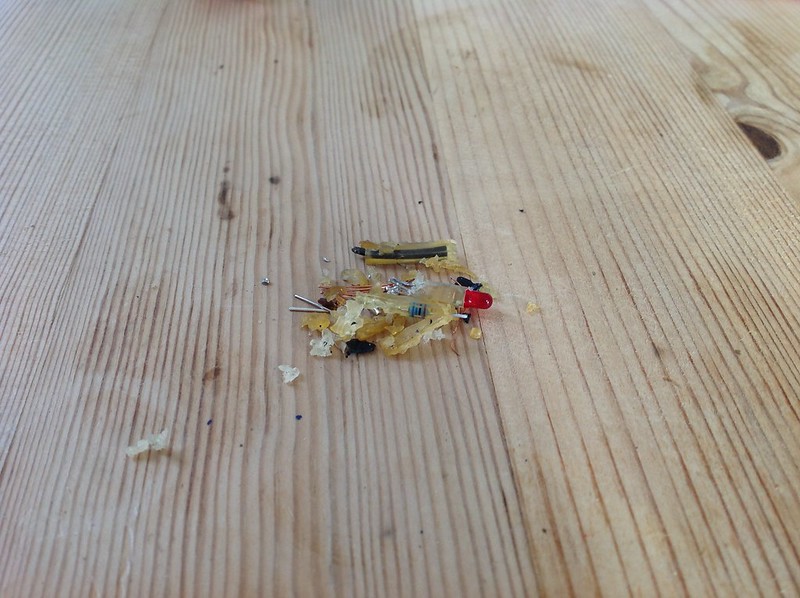
Start chopping, cutting, poking, prying. You are trying to get all of that clear glue out of the housing. The bottom, flat bit doesn't seem to be too much effort. The glue also goes up the tower to the LED though. This is where you need your pointy scriber, get in there and dig as much of it out as you can. You may distort or break the housing but that doesn't matter too much. (See later)
After a bit of perseverance I found that if you get enough of the glue out you can push the LED from the top and it will come out of the housing with the remains of the glue. You end up with a pile of bits like this:
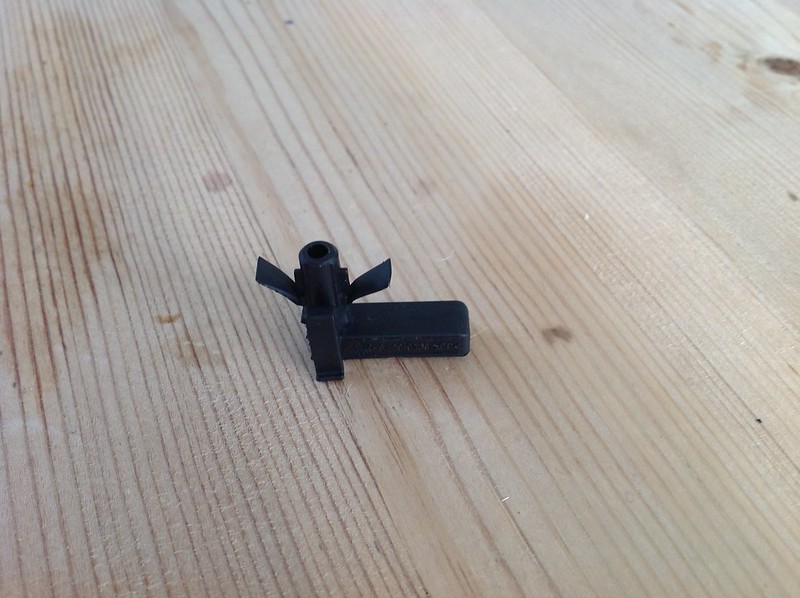
And you have a clean housing ready for the new LED.
*Now hold on.
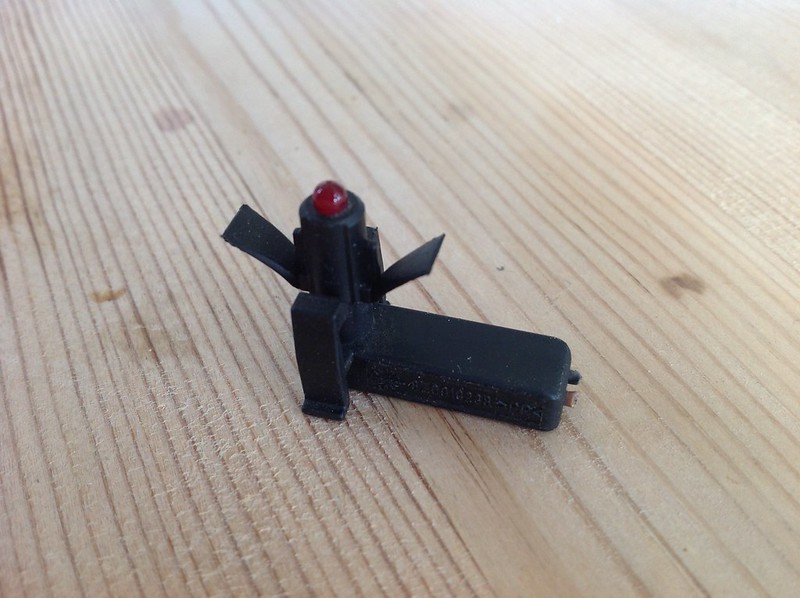
Did you buy a 3mm or 2mm LED? I have 3mm LEDs and found to my annoyance that it is slightly bigger than the stock one it replaces. It wouldn't just slide back up and replace the original. So I ended up slicing the LED tower housing top to bottom and trimming off the lip around the base of the LED. This enabled me to put the new LED in the housing. A 2mm LED would not cause this problem I think. So 2mm May be a better bet, but 3mm fits the door trim nicely, even though it doesn't quite fit in the housing.
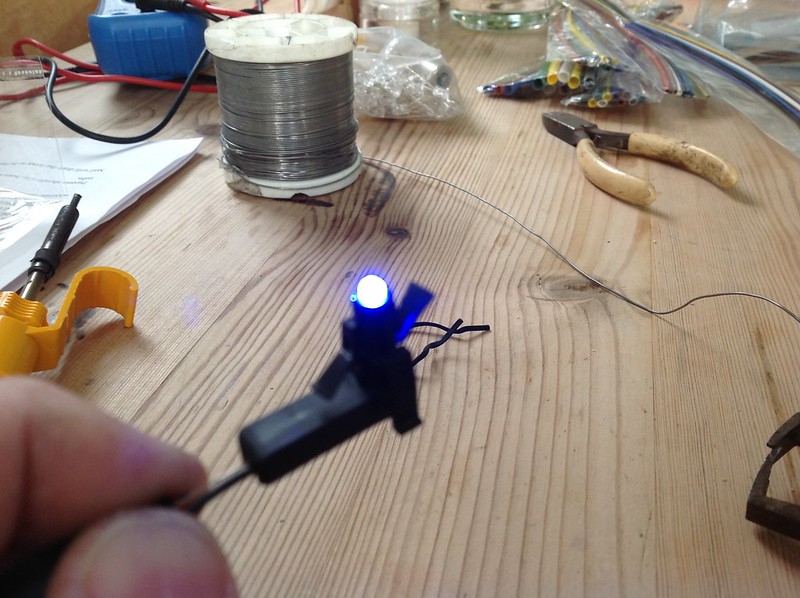
Once the LED is in place in the housing. Solder the resistor to the the LED anode (long pin) and a bit of wire to the cathode. Bend over the new wire and resistor and lay in the housing like the old one used to do. The wire and leg of the resistor will stick out of the housing allowing you to solder them back on to the wires in the car.
Quick test.
Back to the car. Unfortunately i was so keen to get this on I didn't take any pics.
There is plenty of loom to solder your LED to. Simply pull out the wiring and hang the door card on the window area while you are doing this bit. If you haven't done so already, strip and tin the ends on the wiring loom.
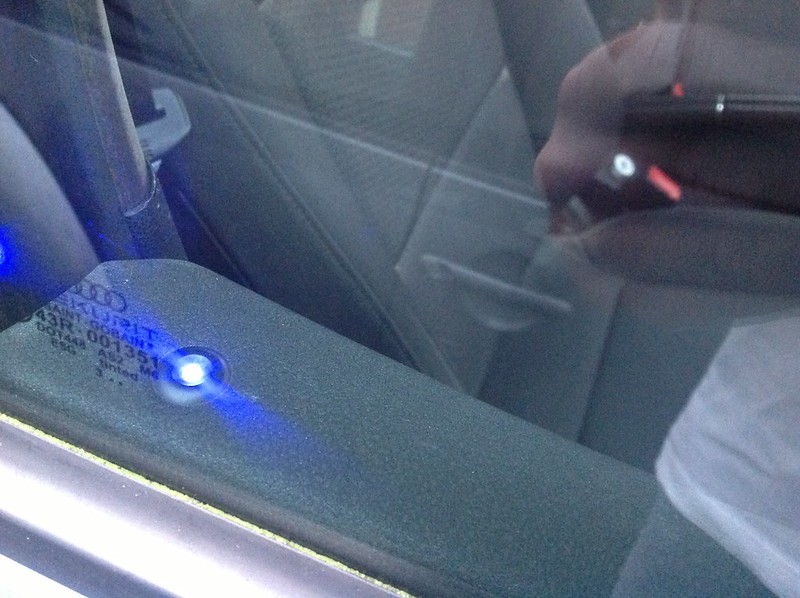
Put heatshrink tubing on the wires and resolder the LED on to the wires. The brown one is earth and needs to be soldered to the WIRE on the LED. The other needs to be soldered to the resistor leg. Once soldered on. roll down the window, shut the doors and tailgate. Lock. The LED, still waving around in the air should flash as the old one did. If it doesn't then try soldering the other way round.
Unlock. Slide the heatshrink tubing over the bare wires and shrink down with a heat gun or the end of your soldering iron.
Using silicone or if you have a glue gun, use that, fill up the base of the LED housing in an effort to stop the wires moving around.
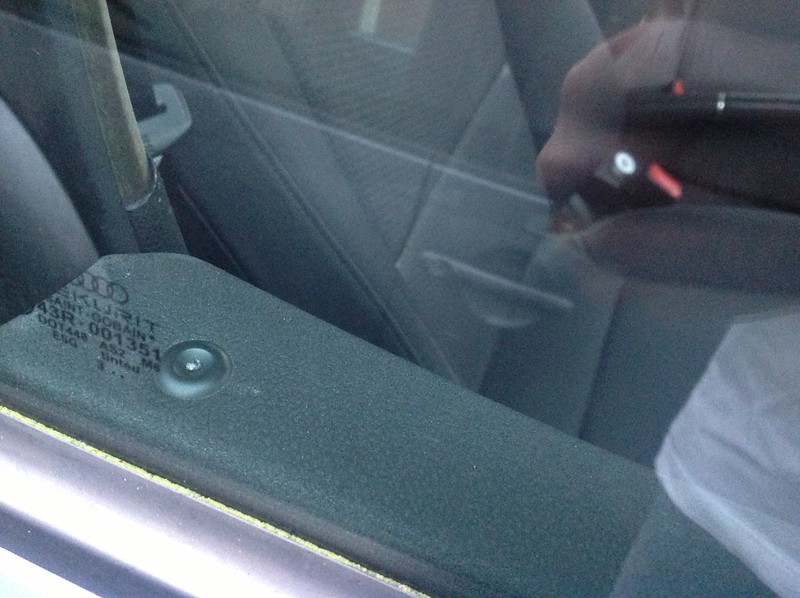
Clip the LED back into place in the door card and refit the door card. It might be a good idea to do a final test before clipping up and refitting screws.
Job done.
http://youtu.be/QRpWqgR5p7M
Chris
Here's how.
You will need
Tools to get the door panel off. Torx bit and screwdriver
Cutters and pliers.
Wire Strippers.
Soldering iron and solder.
Heatshrink tubing and something to shrink it with.
2mm/3mm* LED of your colour choice and appropriate resistor (470R) for 3mm ultra bright*
Stanley knife/scalpel, scriber (or other sharp pointy instrument)
Glue/silicone
You can disconnect the battery if you see fit. I didn't.
Start by removing the door panel as described here:
http://www.a2oc.net/forum/showthrea...ear-car-door-interior-panel&p=56838#post56838 (Rear is the example, but the procedure for the front is pretty much the same)
Once it is free, find the door panel LED on the top. Squeeze in the tabs and remove it.
Be brave. Cut that puppy off as close to the LED as possible. Leave as much wire in the car as you can.
At this point you can prepare the ends of the wires in the car loom now by stripping back and tinning with fresh solder ready for reconnecting the new LED.
Go indoors. It's cold out.
Look at the LED It's a black plastic moulding the underside of which is filled with a glue type gunk.
At this point you can just give up with this and solder your new LED on to the wires in the car and stick it in to the door card. But trust me this next bit is worth the effort.
Start chopping, cutting, poking, prying. You are trying to get all of that clear glue out of the housing. The bottom, flat bit doesn't seem to be too much effort. The glue also goes up the tower to the LED though. This is where you need your pointy scriber, get in there and dig as much of it out as you can. You may distort or break the housing but that doesn't matter too much. (See later)
After a bit of perseverance I found that if you get enough of the glue out you can push the LED from the top and it will come out of the housing with the remains of the glue. You end up with a pile of bits like this:
And you have a clean housing ready for the new LED.
*Now hold on.
Did you buy a 3mm or 2mm LED? I have 3mm LEDs and found to my annoyance that it is slightly bigger than the stock one it replaces. It wouldn't just slide back up and replace the original. So I ended up slicing the LED tower housing top to bottom and trimming off the lip around the base of the LED. This enabled me to put the new LED in the housing. A 2mm LED would not cause this problem I think. So 2mm May be a better bet, but 3mm fits the door trim nicely, even though it doesn't quite fit in the housing.
Once the LED is in place in the housing. Solder the resistor to the the LED anode (long pin) and a bit of wire to the cathode. Bend over the new wire and resistor and lay in the housing like the old one used to do. The wire and leg of the resistor will stick out of the housing allowing you to solder them back on to the wires in the car.
Quick test.
Back to the car. Unfortunately i was so keen to get this on I didn't take any pics.
There is plenty of loom to solder your LED to. Simply pull out the wiring and hang the door card on the window area while you are doing this bit. If you haven't done so already, strip and tin the ends on the wiring loom.
Put heatshrink tubing on the wires and resolder the LED on to the wires. The brown one is earth and needs to be soldered to the WIRE on the LED. The other needs to be soldered to the resistor leg. Once soldered on. roll down the window, shut the doors and tailgate. Lock. The LED, still waving around in the air should flash as the old one did. If it doesn't then try soldering the other way round.
Unlock. Slide the heatshrink tubing over the bare wires and shrink down with a heat gun or the end of your soldering iron.
Using silicone or if you have a glue gun, use that, fill up the base of the LED housing in an effort to stop the wires moving around.
Clip the LED back into place in the door card and refit the door card. It might be a good idea to do a final test before clipping up and refitting screws.
Job done.
http://youtu.be/QRpWqgR5p7M
Chris
Last edited:

