Tomscar
Member
Today I ...
Project Resurgam, an early start this morning and I could barely contain the anticipation, everything was lined up to install the front control arms ... all parts delivered, the tools were laid out, WD40 and breaker bar at the ready
The plan was to leave all the bolts tight on the passenger side, put a jack under the Subframe and change the drivers side first, hopefully this will keep the relative position of the Subframe to the Chassis.
A heavy duty ball joint separator was used to release the control arm from the knuckle assembly ... an easy job with the right tools.
Two bolts to remove the Console from the Chassis with an 18mm socket, a long extension was useful on the one under the arch.
Another two bolts that go through the Subframe and Console, holding the steering rack in place, removed with a 16mm socket.
One long bolt that goes through the front of the Subframe and locates the leading edge of the control arm also removed with an 18mm socket.
A two foot breaker bar loosened all the bolts prior to ordering any parts and nothing was stuck.
All bolts are single use and new ones are going back in.
The Console and Control Arm slipped out easily and isn't that heavy or awkward to manoeuvre ... I'm on axle stands and there was plenty of room.
1. Out with the old.

2. Console Positions Marked ... All the bolts had been sprayed with WD40 over the last weeks and already made sure they would loosen off before attempting or buying anything ... I had enough leverage with a two foot breaker bar.

3. Two arm puller ... Two minute job extracting the old control arm when it was held in the vice.

4. Thorough Console Clean ... With Gunk and a wire brush.

5. Ball Joint Advisory on Last MOT ... This one is very slack and might be the reason for the suspension knocking.

6. Control Arm Inserted ... Used the old bolt to drive the control arm into the rear Console bushing.

7. Ready to go back in

8 Subframe ... you can see the steering rack on top and where the 16mm bolts locate through from the bottom into it.

9. Control Arm almost back in.

10. Don't Panic ... if the captive nut turns when you reinsert the 18mm bolts to the chassis
The first side was completed in no time but thought I'd broken something when undoing the back 18mm Console bolt on the other side ... the bolt was turning but not coming out ... a little bit of investigating and discovered that clever Audi insert the captive nut through a slot in the chassis, I had managed to dislodge it from the plastic tray that pushes into the slot ... a little bit of jiggling with a small screwdriver held the nut in place until the bolt was unscrewed and after the nut was placed back in the tray it held in place when it was reassembled.
These are the part numbers as far as I could make out.
Thanks Robin Cox ...
There are two of these threaded plates on each side ... the console bolts locate into these.
Part numbers:
8Z0 805 689 Threaded Plate
8Z0 805 413C Retaining Cover

None of the bolts are torqued yet and will give them the final 'stretch' when everything is lined up and sitting on four wheels.
A satisfying job all-round and took about five hours for both sides ... including coffee breaks and a nosey on the A2OC forums.
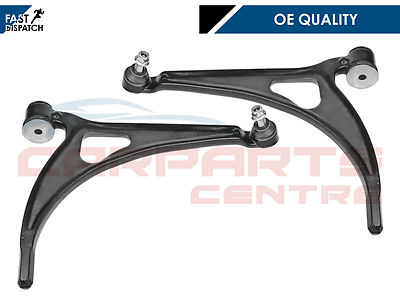
Meyle control arms were used (£62 each), all new bolts from Belfast Audi (£32) and I also bought a two arm puller (£12) and a Draper Ball Joint Separator (£16) to make the job easier.
Thanks for reading ... maybe should put a list together of all the tools that I used to complete the job
Project Resurgam, an early start this morning and I could barely contain the anticipation, everything was lined up to install the front control arms ... all parts delivered, the tools were laid out, WD40 and breaker bar at the ready
The plan was to leave all the bolts tight on the passenger side, put a jack under the Subframe and change the drivers side first, hopefully this will keep the relative position of the Subframe to the Chassis.
A heavy duty ball joint separator was used to release the control arm from the knuckle assembly ... an easy job with the right tools.
Two bolts to remove the Console from the Chassis with an 18mm socket, a long extension was useful on the one under the arch.
Another two bolts that go through the Subframe and Console, holding the steering rack in place, removed with a 16mm socket.
One long bolt that goes through the front of the Subframe and locates the leading edge of the control arm also removed with an 18mm socket.
A two foot breaker bar loosened all the bolts prior to ordering any parts and nothing was stuck.
All bolts are single use and new ones are going back in.
The Console and Control Arm slipped out easily and isn't that heavy or awkward to manoeuvre ... I'm on axle stands and there was plenty of room.
1. Out with the old.
2. Console Positions Marked ... All the bolts had been sprayed with WD40 over the last weeks and already made sure they would loosen off before attempting or buying anything ... I had enough leverage with a two foot breaker bar.
3. Two arm puller ... Two minute job extracting the old control arm when it was held in the vice.
4. Thorough Console Clean ... With Gunk and a wire brush.
5. Ball Joint Advisory on Last MOT ... This one is very slack and might be the reason for the suspension knocking.
6. Control Arm Inserted ... Used the old bolt to drive the control arm into the rear Console bushing.
7. Ready to go back in
8 Subframe ... you can see the steering rack on top and where the 16mm bolts locate through from the bottom into it.
9. Control Arm almost back in.
10. Don't Panic ... if the captive nut turns when you reinsert the 18mm bolts to the chassis
The first side was completed in no time but thought I'd broken something when undoing the back 18mm Console bolt on the other side ... the bolt was turning but not coming out ... a little bit of investigating and discovered that clever Audi insert the captive nut through a slot in the chassis, I had managed to dislodge it from the plastic tray that pushes into the slot ... a little bit of jiggling with a small screwdriver held the nut in place until the bolt was unscrewed and after the nut was placed back in the tray it held in place when it was reassembled.
These are the part numbers as far as I could make out.
Thanks Robin Cox ...
There are two of these threaded plates on each side ... the console bolts locate into these.
Part numbers:
8Z0 805 689 Threaded Plate
8Z0 805 413C Retaining Cover
None of the bolts are torqued yet and will give them the final 'stretch' when everything is lined up and sitting on four wheels.
A satisfying job all-round and took about five hours for both sides ... including coffee breaks and a nosey on the A2OC forums.
Meyle control arms were used (£62 each), all new bolts from Belfast Audi (£32) and I also bought a two arm puller (£12) and a Draper Ball Joint Separator (£16) to make the job easier.
Thanks for reading ... maybe should put a list together of all the tools that I used to complete the job
Last edited: