My A2 'blog'...

Hi Tuffty, sorry to drag up a old thread but I have also developed a leak on one of my coolant pipes, the same single pipe you have replaced on your Coolant Flange, the fat one, is there any chance you could give me the part number please, I have a (A2 1.4 tdi) 2003

Thanks Shaper

Hardly an old thread lol... I don't update very often as the car generally behaves herself (although there is an update planned very soon)

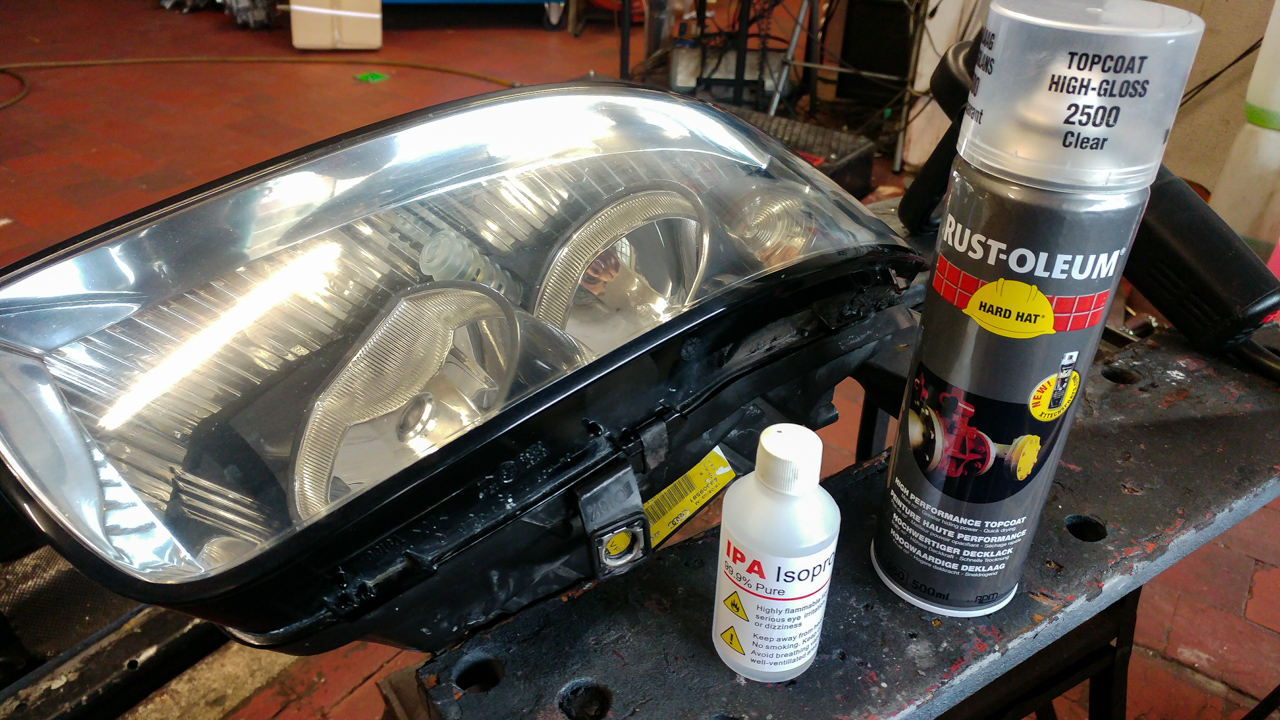
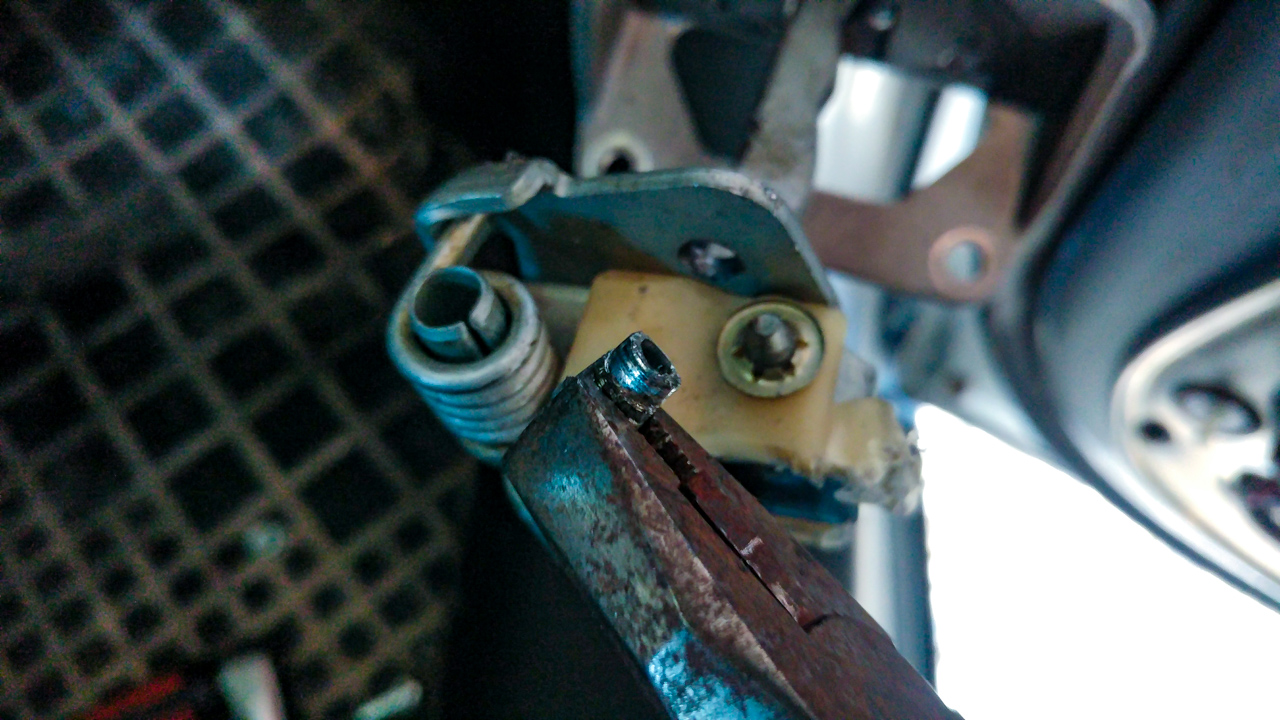
Part number is on the part in the picture dude (great thing about VAG parts is they generally all have a part number on)
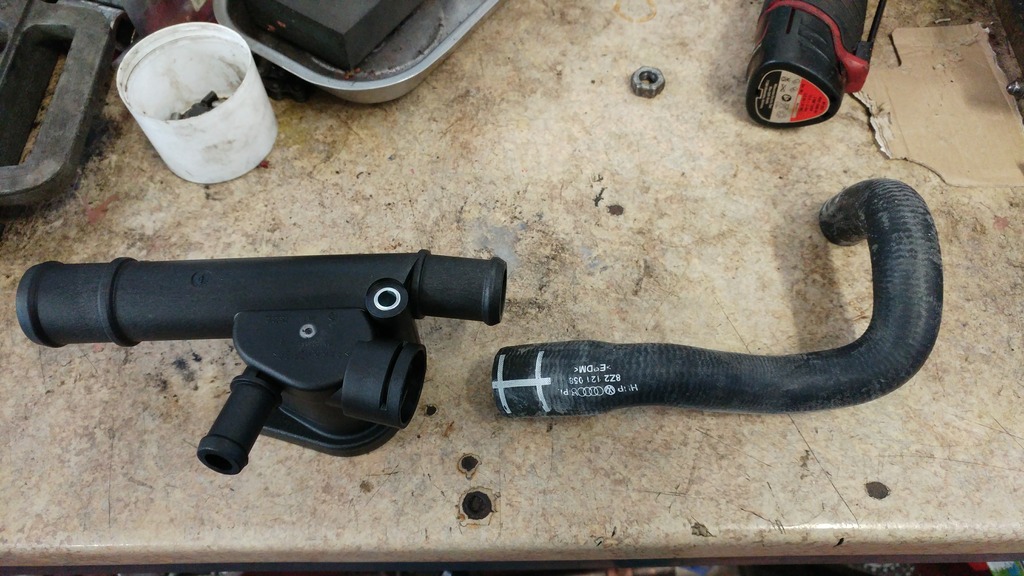
20170120_095319.jpg


And for clarity...
Screen Shot 2017-09-02 at 20.05.39.png

Part number can be found here too...
https://audi.7zap.com/en/rdw/audi+a2/a2/2000-248/1/121-121038/#15

Decent resource for part numbers

And... due to being fully OCD...
8Z2 121 058

Seeing as I am here now I will also add a couple of pics I took recently (as is the way of things :) )

A couple from a recent race meeting at Castle Combe..
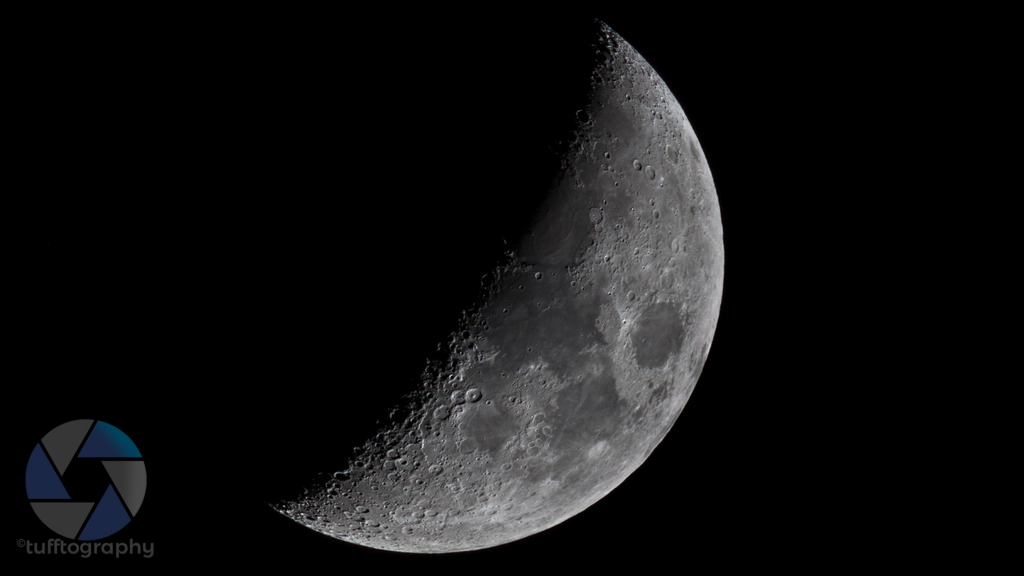
20170813-96dpi-IMG_7269.jpg


20170813-96dpi-IMG_7382.jpg


20170813-96dpi-IMG_7405.jpg


20170813-96dpi-IMG_7467.jpg


Another moon...
20170402-IMG_9634-Edit.jpg


The recent partial eclipse...
20170821-96dpi-IMG_7742.jpg


...and lastly a balloon at sunset (while waiting for the partial eclipse)
20170821-96dpi-IMG_7691.jpg


Obviously there are more pics on my blog ;)

<tuffty/>
 
Last edited:
Thanks for your reply tuffty
I now realise the part number is on the hose, I also got in touch with TPS in Stockport, and tried to order the same
one, thinking it would be the same hose I needed, but when I gave them my vin number to check the part, they gave me
a totally different part number, even though I showed them your pictures of the hose..

according to Etka my hose number is 8Z2 121 058 B, but the part number TPS are saying I need is
8Z0 819 373 P, so I'm a little confused as which one to buy

Regards Shaper

What engine code is yours? Mines a later BHC... the earlier AMF have a different pipe IIRC so if yours is an AMF then pretty sure it will be a different hose to mine

<tuffty/>
 
Thanks again

Yes I should have mentioned my engine code is AMF, still confused which one to go for though...

Regards Shaper
 
Thanks again

Yes I should have mentioned my engine code is AMF, still confused which one to go for though...

Regards Shaper

https://audi.7zap.com/en/rdw/audi+a2/a2/2003-248/8/819-819060/#10

I would go for the one Audi suggest... if they get it wrong they will have to deal with it... your car is on the cusp of the change to BHC engine code so VAG use up old parts on some of the early change cars before moving over to the revised setup...

I know the EGR etc is different between AMF and BHC and this is the hose that goes to the EGR cooling jacket

<tuffty/>
 
Finally got onto a job I have been planning to do since I got the car...

Drivers side headlight is a state...
20170903-96dpi-20170903_102235.jpg


...so removed it to refurbish it... using a combination of wet and dry from 400 to 3000 grit I rubbed the lens down to an even finish all over...

I started with 400 grit... this was mainly down to how bad the light was... if it was less clouded I would normally start from 1000 grit...
20170903-96dpi-20170903_110237.jpg


..then work up though 800, 1000, 2000, 3000 to remove as much of the scratches and imperfections you can
20170903-96dpi-20170903_111648.jpg


...then a few passes with compounding polish..
20170903-96dpi-20170903_112348.jpg


...and finally a few passes with a finishing polish...
20170903-96dpi-20170903_113817.jpg


As doing this removes the UV protection (the bit that ironically goes yellow over time causing this in the first place!) I decided to use a UV fast clear lacquer to coat the lens with... I IPA'd over it first to remove polish residue
20170903-96dpi-20170903_120856.jpg


Unfortunately due to various reasons (4 year old lacquer, damp conditions, any other random excuse I can think of!) the lacquer bloomed a bit and didn't dry with a particularly smooth finish... shame as I have used this lacquer in the engine bay of my S3 and is still holding up despite my best efforts... so I used a heat gun to assist in drying and left it a couple of hours to flash off...

I then rubbed it down with 2000 and 3000 grit until smooth and refinished with the compounding/finishing polishes as before... it didn't get rid of all the imperfections though...
20170903-96dpi-20170903_140657_HDR.jpg


...but its night and day better than before...
20170903-96dpi-20170903_140640.jpg


Refitted it to the car... as you can see its quite different to the passenger side light (which I will now have to do as well!!!)
20170903-96dpi-20170903_144124.jpg


20170903-96dpi-20170903_144131.jpg


Happy with that... one less job off the list...

<tuffty/>
 
Great work there mate. Really improved the front end I bet.

Thanks dude... does look loads better... poor old girl tends to play second fiddle to the S3 but its always nice to work on her from time to time :)

A benefit of Scottish living - Sun damaged anything is pretty unlikely.


Sent from my iPhone using Tapatalk

Think I'd rather the sun damage than the rusty undersides I have seen on most cars originating from Scotland... really need to get up that way though... decent photo ops up there :)

I had a few more pics of the process but can only post 10 at a time... Admins clearly weren't banking on a snap happy chappy like me posting up more pics than a Haynes manual :D

My advice to anyone who wants to give it a go for the first time is go for the least aggressive grit first... start point does depend on how bad the headlight is to start with... there are two main areas to address with lights... stone chip marks and the yellowing/dulling of the lens...

Stone chips etc can require a bit of work as they can be 'deep' so you would need to remove a fair amount of the plastic to recover... you obvs need to be realistic depending on how bad the damage is..

The yellowing/dulling is the UV protection layer giving up the ghost.... you essentially need to remove this to get to bare plastic again... initial sanding will look patchy and the aim is to get the finish even all over..

Use warm water with a little washing up liquid in it... wipe over regularly to get rid of the debris as you sand... I would say maybe start at 2000 grit, drop to 1000 grit if the going is tricky...

They will tend to look like this after a little work..
20170903-96dpi-20170903_104157.jpg


You just need to work at it until smooth... if you find its taking a lot of effort then go down a grit... the plastic is soft so scratches easily... I still have sanding marks that I could have got rid of if I had tried harder but it is what it is..

Anyhoo... I will make an effort to pop over to the A2OC stand at ADI... I will be in the S3 on the day supporting Bill in the BadgerWagon (won't be going round the track myself)

I will try and get some trackside images if you guys are going out though

<tuffty/>
 
Awesome Blog Tuffty, i've enjoyed reading this for the last few hours.
Your car looks great, i'm hoping that the one I have just bought will not have some tricky leaks and issues, but she's an old girl now so will need a bit of investigation this weekend over at Dad's driveway garage!

I also have enjoyed looking through your photography too I see you've got an AE-1, a lovely camera! i stocked up on Tri-x 400 when it was announced production for it would be stopped. Top stuff! and i look forward to reading more!

AL

Thanks dude... hopefully it will be of some use to people although I really need to sort out relinking the pics for when I bin off photobucket...

I managed to relink all my posts in my blog last night... now faced with a the task of doing the same for my S3 build thread on Audi Sport and of course this one...

Seeing as I am here I may as well post these up... Been off work last week on leave and experimenting with my drip rig... I did a full write up on my actual blog but here are a couple of images from my efforts over the week
20171021-96dpi-IMG_1974-Edit.jpg


20171024-96dpi-IMG_2346-Edit.jpg


20171025-96dpi-IMG_2622-Edit.jpg


20171025-96dpi-IMG_2634-Edit.jpg


20171026-96dpi-IMG_2739-Edit.jpg


20171026-96dpi-IMG_2972-Edit.jpg


<tuffty/>
 
Last one is very cool. Would be interested to see a lighting diagram for them. Have you seen Karl Taylor photography. Does some nice liquid stuff might be worth looking at.


Sent from my iPhone using Tapatalk
 
Last one is very cool. Would be interested to see a lighting diagram for them. Have you seen Karl Taylor photography. Does some nice liquid stuff might be worth looking at.
Sent from my iPhone using Tapatalk

Don't have a 'diagram' as such but details of how I lit them in on my blog... will take a look at Karl's work :)

Amazing! Are you adding thixotrophics or viscosity enhancing additives to get these?


Sent from my iPhone using Tapatalk

The 'yellow' ones are full fat milk... the water ones are using a thickened solution using xantham gum... I have not got the magic mix yet but will be doing some viscosity tests to try and get it as close to the full fat milk as poss as that gave me some nice results...

Fantabulous! :)

Thanks dude

<tuffty/>
 
A problem manifested itself over the last week... the check strap on the drivers door started to make an unusual noise... this then got worse and at one point I couldn't close the door so thought it was time to look at it :)

Used the info here to get the door panel off...
http://workshop-manuals.com/audi/a2...trim/removing_and_installing_front_door_trim/

Wasn't too bad tbh...
20171117-96dpi-20171117_143820.jpg


The problem was pretty obvious... the 'strap' mech had come away from the bracket... seems its only pop riveted on and they had 'popped' out..
20171117-96dpi-20171117_144017.jpg


20171117-96dpi-20171117_145057.jpg


Used a couple of bolts to fix it back on the bracket...
20171117-96dpi-20171117_145543.jpg


...and all was well again...

In other news I have been quite busy after my week off playing with drop photography... having hit a few limits of what my current setup can do I did a bit more research and found the circuit diagram to build something a little more flexible using an Arduino micro controller platform so I built this...
20171116-96dpi-20171116_202333.jpg


The setup can be controlled via a phone app over bluetooth and controls each valve separately which is just what I need to give me better control..

Setup a basic shoot to test it out... two flashes and two drops...
20171112-96dpi-IMG_3480-Edit.jpg


Much easier to get setup and more consistent results... next I plan to set up three valves and see how I get on...

More details on this in my blog :)
http://www.tuffty.co.uk/blog/2017/11/12/drop-controller-diy/

One last image before I go... for the past three and a half years I drive past this tree on the way to work... its a a very lonely looking tree and is not even really tree shaped... been meaning to grab a picture of it for ages and then an opportunity presented itself so I took the shot...
20171106-96dpi-7D2_3243-Edit.jpg


<tuffty/>
 
Last edited:
Back
Top