Rivnuts

wilco184

Member of the year 2015
All,

Like many, a few of the threaded studs underneath my car have snapped over the years, and as a result, the heat shielding that they attach is less secure than it once was. I'd like to change this, and find a solution. :rolleyes:

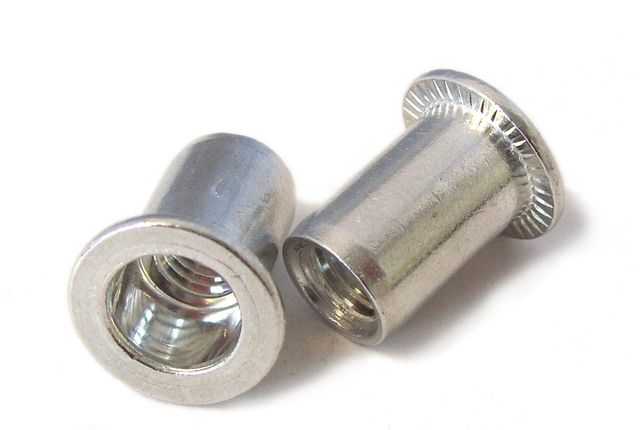
I've done a fair bit of research, and the answer to my problem that I think is the best is to use 'Rivnuts' in place of the old studs. Essentially, they're like pop rivets with an internal thread. They work quite similar too, where you're pulling the end back towards to sheet metal to compress the weaker part of the fixing again the sheet, holding it in place firmly. You can purchase a few different types, although the two that I think will work best are as follows.

The aluminium type; I should be able to avoid contact corrosion using these, but I'm unsure how well they will seal.


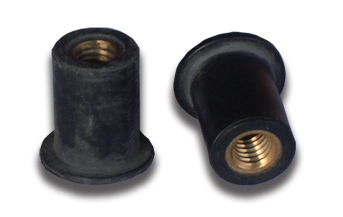
The rubber type; made from a synthetic rubber with a brass insert. This should avoid contact corrosion and should seal, although I'm unsure how secure they'll be.


If anyone has any information or previous experience of these fasteners, then I'd be grateful to hear if they've worked well etc. I'd also be keen to know peoples thoughts on Aluminium vs Rubber, regarding which would be best. :p

Please let me know! :)

Thanks,

Matt.
 
Another vote for the alloy ones.
The next question is 'what bolts to use with them'
Stainless steel has been suggested on the Forum and appears to be an obvious choice but in the galvanic tables, the metals are too dissimilar so the risk of electrolytic corrosion is high.
If you can find a suitable size, the green coated Audi fasteners are probably the safest option

Cheers Spike
 
If you want alloy rivnuts then you could use anodised alloy bolts from a specialist racing bike supplier , various shapes of head are available & most are aero grade alloy.
Past experience with rivnuts is that they will not stand over tightening as they can spin or pull through panel, but should be ok for this type of application.

Keith.


Tapatalk

Good thinking. Anodised alloy bolts could be the perfect solution.
Plenty strong enough to hold a heat shield and thanks to the cycling world, are readily available - something I did not know until checking on ebay

Cheers Spike
 
Many thanks for the replies, everyone. :)

I've purchased some M6 Aluminium Rivnuts. Still not entirely sure what to do about the bolts, but I'll have a think. I'll be sure to update this thread once I've completed the work.

Coincidentally, the shield covering the fuel filter has started rattling because of another failed stud, so I'll aim to get this done fairly soon. :p

Many thanks,

Matt.
 
I thought I'd update this now that the work is complete. :p

I used Aluminium M6 Rivnuts, 304 Stainless Steel M6 Penny Washers and 304 Stainless Steel M6 16mm bolts. The links for these items are here, here and here. They are photographed below.


This is what the existing stud looked like with the heat shield removed. It's the heat shield covering the TDI fuel filter, in front of the rear left wheel. As can be seen, the stud has snapped very nearly at it's base.


I used a Dremel with a sandpaper attachment to grind away the remaining stud. Then, I used a small drill to create a pilot hill in the centre of the old stud. I then used a larger drill, at the correct size for the Rivnut, to create the final hole. The Rivnut was a snug fit, which is good. I put the Rivnut onto the tool, and ran a bead of flexible glue around its inside mating edge, such that when compressed, there would be a perfect seal to keep out water. I then pushed the Rivnut into the hole, pulled the handles and compressed it, creating a good compressive fit. A layer of grey primer finishes the job.

The finished result looks like this.


And with the heat shield reinstalled, it looks like this. I used a washer on the bolt, then the heat shield and then a second washer to 'sandwich' the shield when tightened.


Regards,

Matt. :)
 
Last edited:
I fitted another Rivnut where there was previously a heat shield stud. This time, on the centre tunnel near to the right hand rear wheel. :)


Edit: I clearly need to take more care with the primer! It's difficult when under the car! ;)

Regards,

Matt. :p
 
I fixed another heat shield underneath my car. The difference being that this time, it was slightly more difficult because two of the shield studs are part of the fuel tank. :confused:

Prior to the two studs in the tank being repaired, they looked like this. The old studs are set in an adhesive, on two small 'tabs' attached to the tank. The stud has a small square on the top that sits in the adhesive, in order to stop it spinning.


After removing the studs, I enlarged the hole slightly to accept an M6 bolt. The plastic part of the tank was then 'trapped' between the bolt, a nut and two washers.


I also had to install a Rivnut for the front mounting. Again, I have sealed the Rivnut with adhesive and then applied grey primer.


The shield is wearing quite thin, especially around where the fixings attach. I have repaired it for now, but it will eventually require a new shield.


And finished, in place! :)


Regards,

Matt. :p
 
Hi Matt, were you lucky enough to borrow a professional riveter or did you buy a DIY version.

Any recommendations for the 'casual' riveter

Cheers Spike
 
Hi Matt, were you lucky enough to borrow a professional riveter or did you buy a DIY version.

Any recommendations for the 'casual' riveter

Cheers Spike

Hi Spike,

I purchased a DIY version. I got it from eBay, and it looked very similar to the tool shown below. I'd say certainly for my use of just a few Rivnuts on the car that I didn't need anything more substantial; it seems pretty good and hasn't messed up any Rivnuts. I tried a few test pieces on some scrap sheet Aluminium before I used it on the car and the compressive parts of the Rivnuts seemed to be done evenly and correctly.


Regards,

Matt.
 
You've done a great job there and such good photo's! Well done! . I see that there is quite a bit of corrosion in one of the photo's? It always looks scary and I'd be under there with my Dremel and rotary wire brush ... I just hate rust!

David
 
Hi Spike,

I purchased a DIY version. I got it from eBay, and it looked very similar to the tool shown below. I'd say certainly for my use of just a few Rivnuts on the car that I didn't need anything more substantial; it seems pretty good and hasn't messed up any Rivnuts. I tried a few test pieces on some scrap sheet Aluminium before I used it on the car and the compressive parts of the Rivnuts seemed to be done evenly and correctly.


Regards,

Matt.

There seems to be quite some choice on Ebay? Prices from £11 to well over £100! Have you any suggestions as to exactly which type (I mean Make) to choose? Thanks ...

David
 
You've done a great job there and such good photo's! Well done! . I see that there is quite a bit of corrosion in one of the photo's? It always looks scary and I'd be under there with my Dremel and rotary wire brush ... I just hate rust!
David

Looks like Audi cut corners and used steel nuts and bolts to hold on the aluminium heat shields. Not only does the steel rust but there is bimetallic/galvanic
corrosion http://www.npl.co.uk/upload/pdf/bimetallic_20071105114556.pdf when steel is next to aluminium (or whenever any different metals join). This eats away the aluminium. I'm going to use aluminium nuts and bolts to fix mine but they are expensive and there is less choice.

Many steel bolts on the A2 are coated to provide a protective layer. I expect those are expensive as well! Maybe the heat shield nuts were coated but the coating may have broken down after 10+ years, especially when exposed under the car.

Threaded connections on the Audi A2.
All fastening components that come into
contact with aluminium are coated with
Dacromet, Delta Tone or a similar coating to
prevent contact corrosion.

In addition these parts are coloured with a
green lubricant on an alkyd resin basis to
provide a clear distinction to normal
fastening components.

Source: AUDI A2 - Body Construction and Function Self-study programme 239
 
Matt,

Did you need to repair the fixings at the rear of your the fuel tank? I checked mine today and both have come loose, but I can't see how to replace the studs as they appear to be fixed directly to the tank.
I've managed to secure the shield using a nut screwed onto the end of the existing stud, but it needs a permanent fix, so if anyone has an idea on how to repair this it would be appreciated.

Steve
 
Hi Steve,

Are you talking about the fixings for the rear silencer box shield? If so, then I also have one loose. I've had a quick look at sorting it but haven't worked anything out yet. It looks as if you can't get access to the other side which makes things slightly more tricky.

Regards,

Matt.
 
Matt,

Yes, that's the ones. The fixings appear to be attached to a plastic housing that is glued or welded to the fuel tank, with no access to the rear.
I've done a temporary repair on our car for now but need to look at something more permanent.

Let us know how you get on with yours.

Steve
 
Back
Top