Job done (almost!)
Well, after a solid 7 hours work, I'm pleased to say that the new brakes and hubs are in position and the majority of the work is done.
I say majority as there was a small hitch - the first bolt I tried (all had been soaked in WD40 for hours) was welded tight and had to be ground down to such an extent that the nylock material melted out and I could then free the nut - by which time the threads were visible on both sides of the bolt!
So, apart from the tie rod end on the nearside, it's all done.
Now the bad news - I didn't take photos of the various steps, but, I will do a full write up for those interested.
It's all very straightforward, but you do need a decent set of spanners and sockets, as well as a few specialised tools (36mm bi-hex socket, ball joint puller, Manchester screwdriver).
The basic procedure is as follows:
Loosen the wheel bolt and drive shaft nut (36mm nut on later models) before lifting the front wheel and securing on axel stands.
Remove the wheels fully and then remove all clips on the brake lines, brake wear connector and the speed sensor connector.
Remove the plugs to access the caliper carrier bolts and remove, using 7mm allen key.
Lever off calipers and place on the floor, to the rear of the steering rod (the removed clips mean it does sit on the floor and puts no weight on the hose).
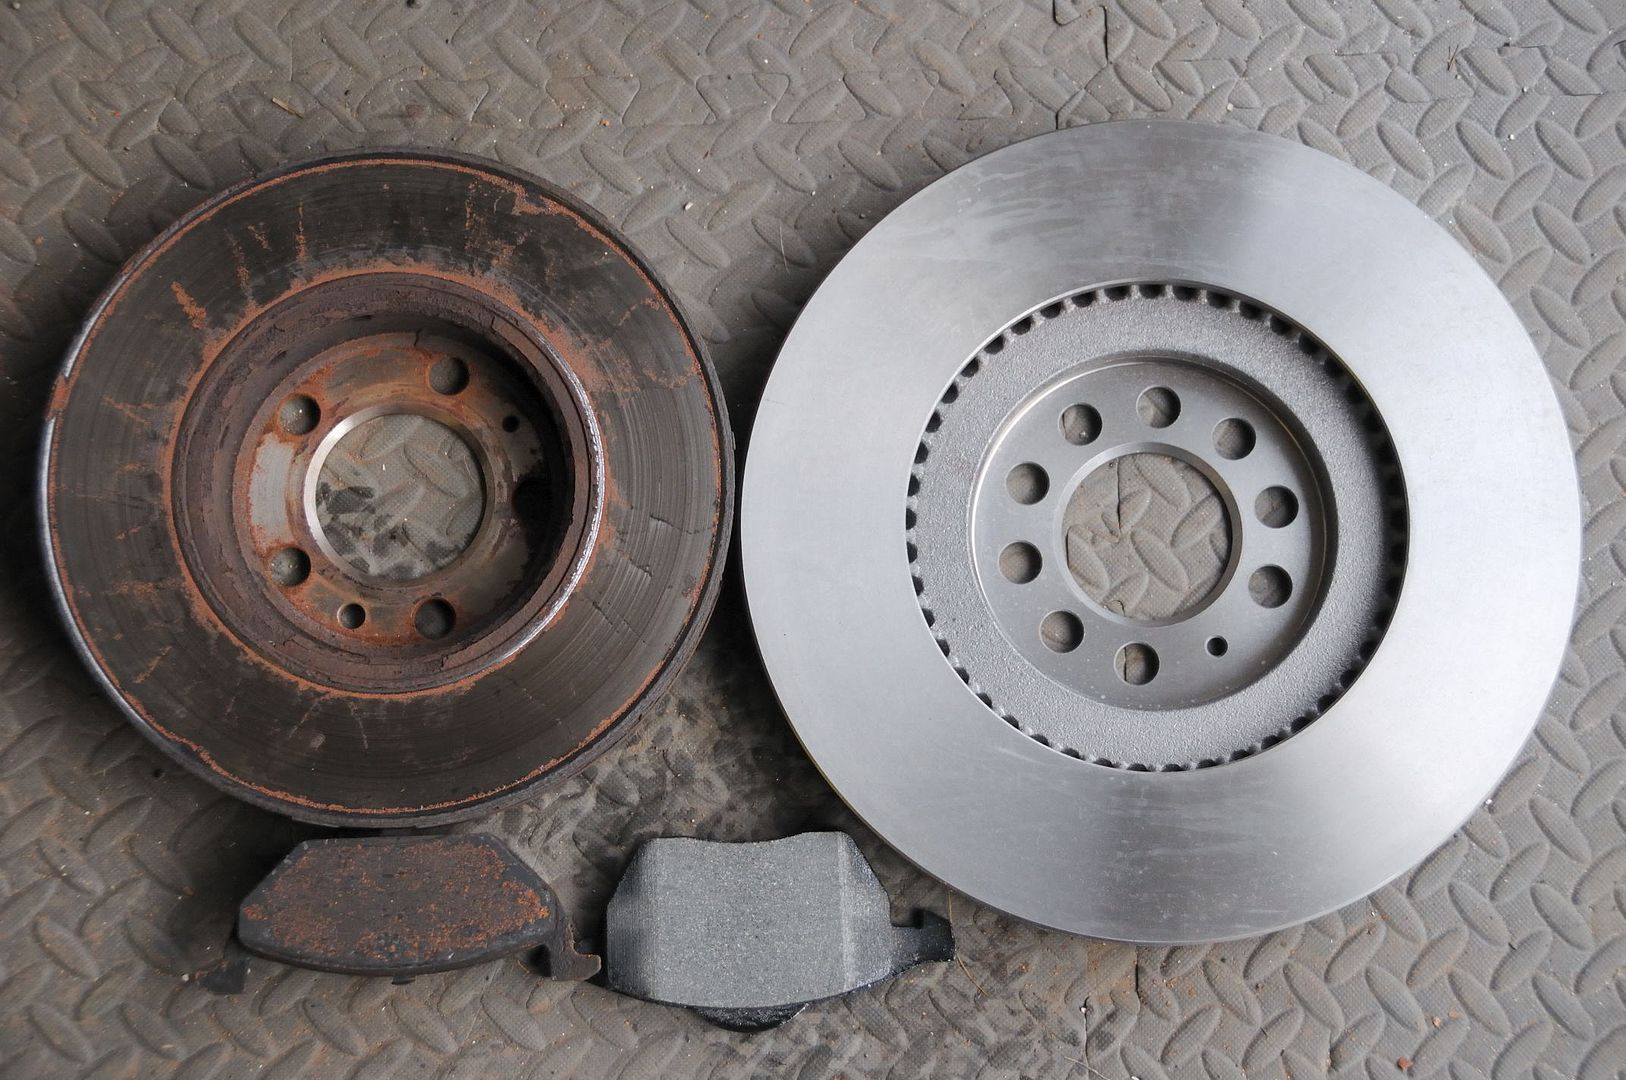
Remove the brake disc and splash shield (cross-head screw for disc, use an impact driver, and 3 x 8mm bolts for the splash shield).
Hammer in a 6mm allen key to the central part of the tie rod end, then use a spanner to undo the M12 nylock nut. Once the thread is exposed, sharp taps to the allen key will free the tie rod end from the hub housing.
Undo the 3 bolts from the ball joint that attach it to the wishbone arm, marking the positions first.
Then, using a 3-legged puller, or hub puller, press out the drive shaft. Clean off the residue fron the splines (old thread lock) and de-grease, ready for re-insertion.
Undo the pinch bolt at the back of the damper and then using a wedge, lever the hub housing apart slightly to allow the hub housing to be tapped down and off the damper.
When the hub housing is free, undo the 5mm allen bolt and wiggle the speed sensor out. Then, undo the 10mm bolt to remove the hose bracket. Finally, as per the tie rod end, hammer in a bit (in this case, a T40 torx bit, not 6mm hex)) to the central part of the assembly and using an 18mm spanner, undo the nut. Press the ball joint out using a ball joint puller.
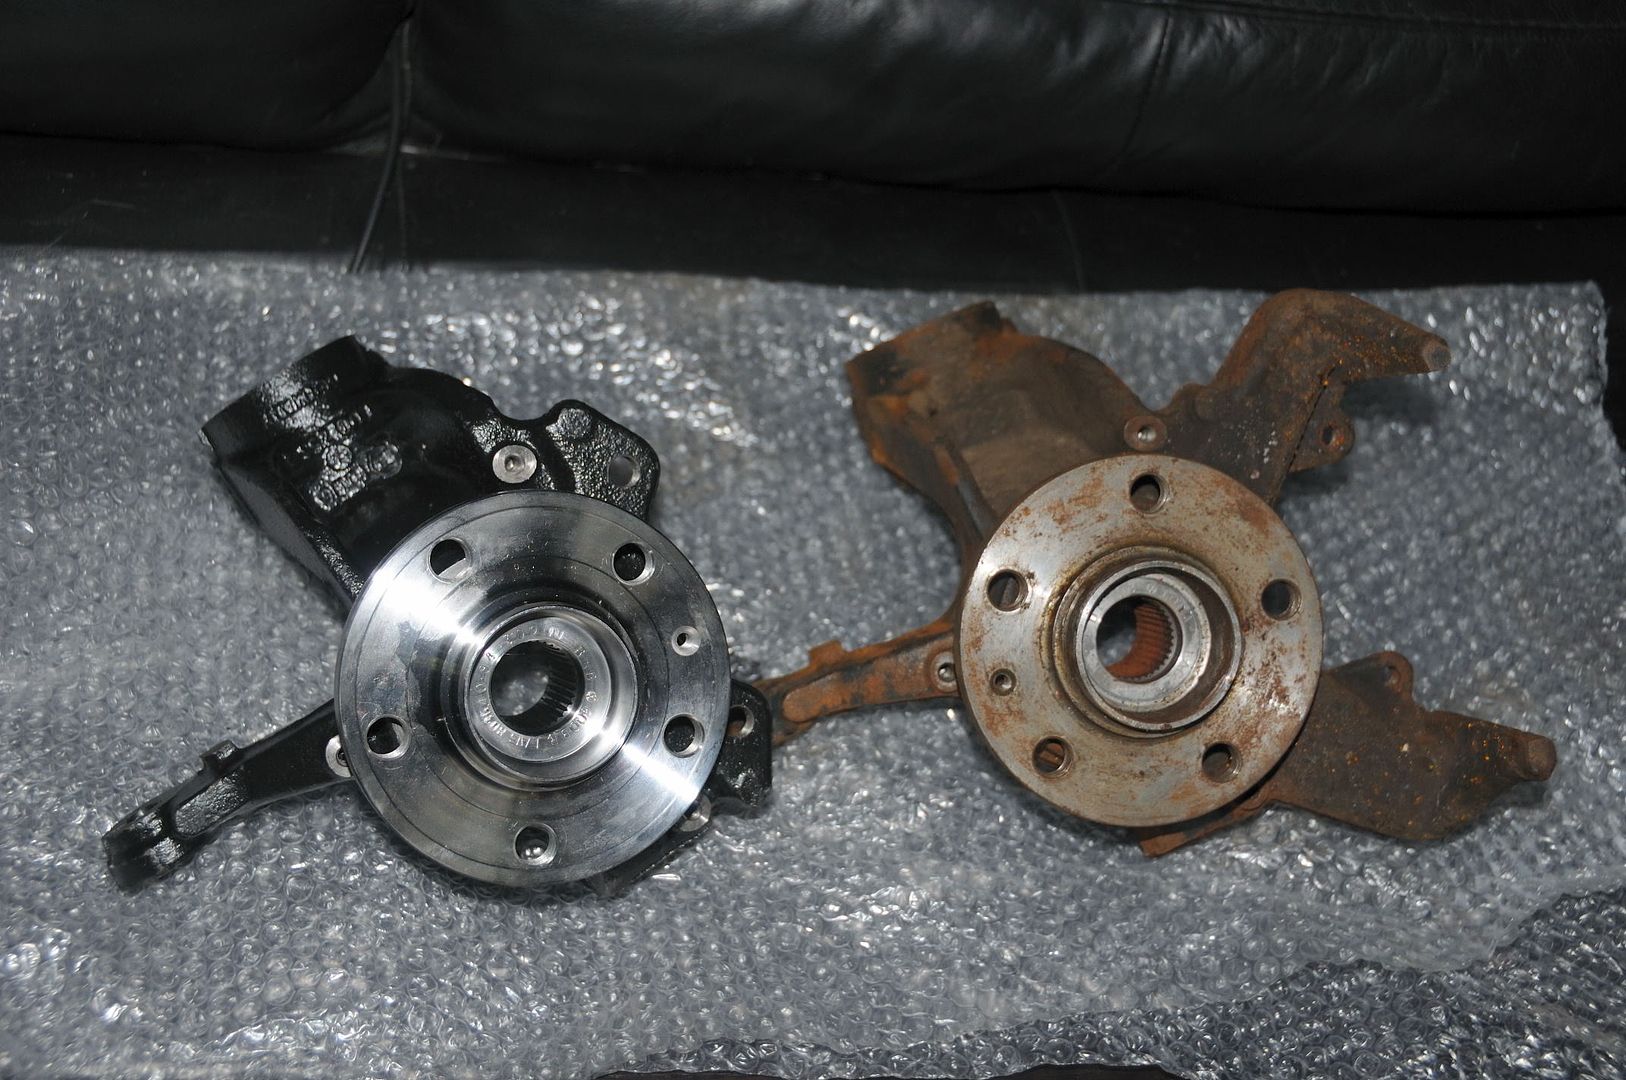
The old hub is now stripped and so you should clean up the area and make preparations for installing the new hub housing (insert ball joint, speed sensor and hose brackets).
Lightly grease the inside of the hub housing to make installation on the damper easier. Re-install on the damper, making sure the tab on the back of the damper is correctly aligned with the housing.
Re-assemble the drive sharft into the hub housing and loosely screw on the new (it must be new) nut. This can be torqued up when the tyre is on and the wheel is on the ground.
Re-assemble the 3-bolt fixing to the wishbone arm, making sure you get the bolts back in the same place you marked.
Re-attach the tie rod end and make sure all the nuts are torqued up. Attach the speed sensor cable.
Undo the 2 x 10mm bolts holding the brake hose union bracket to the top of the wheel arch and split the union (needs a couple of spanners, 11mm and 15mm from memory).
At this stage, brake fluid will start to leak out, so, get the new hose ready (if you're changin hoses) and re-attach. If you are using braided lines, the brake union bracket will need modifying to accept the new, bigger nut.
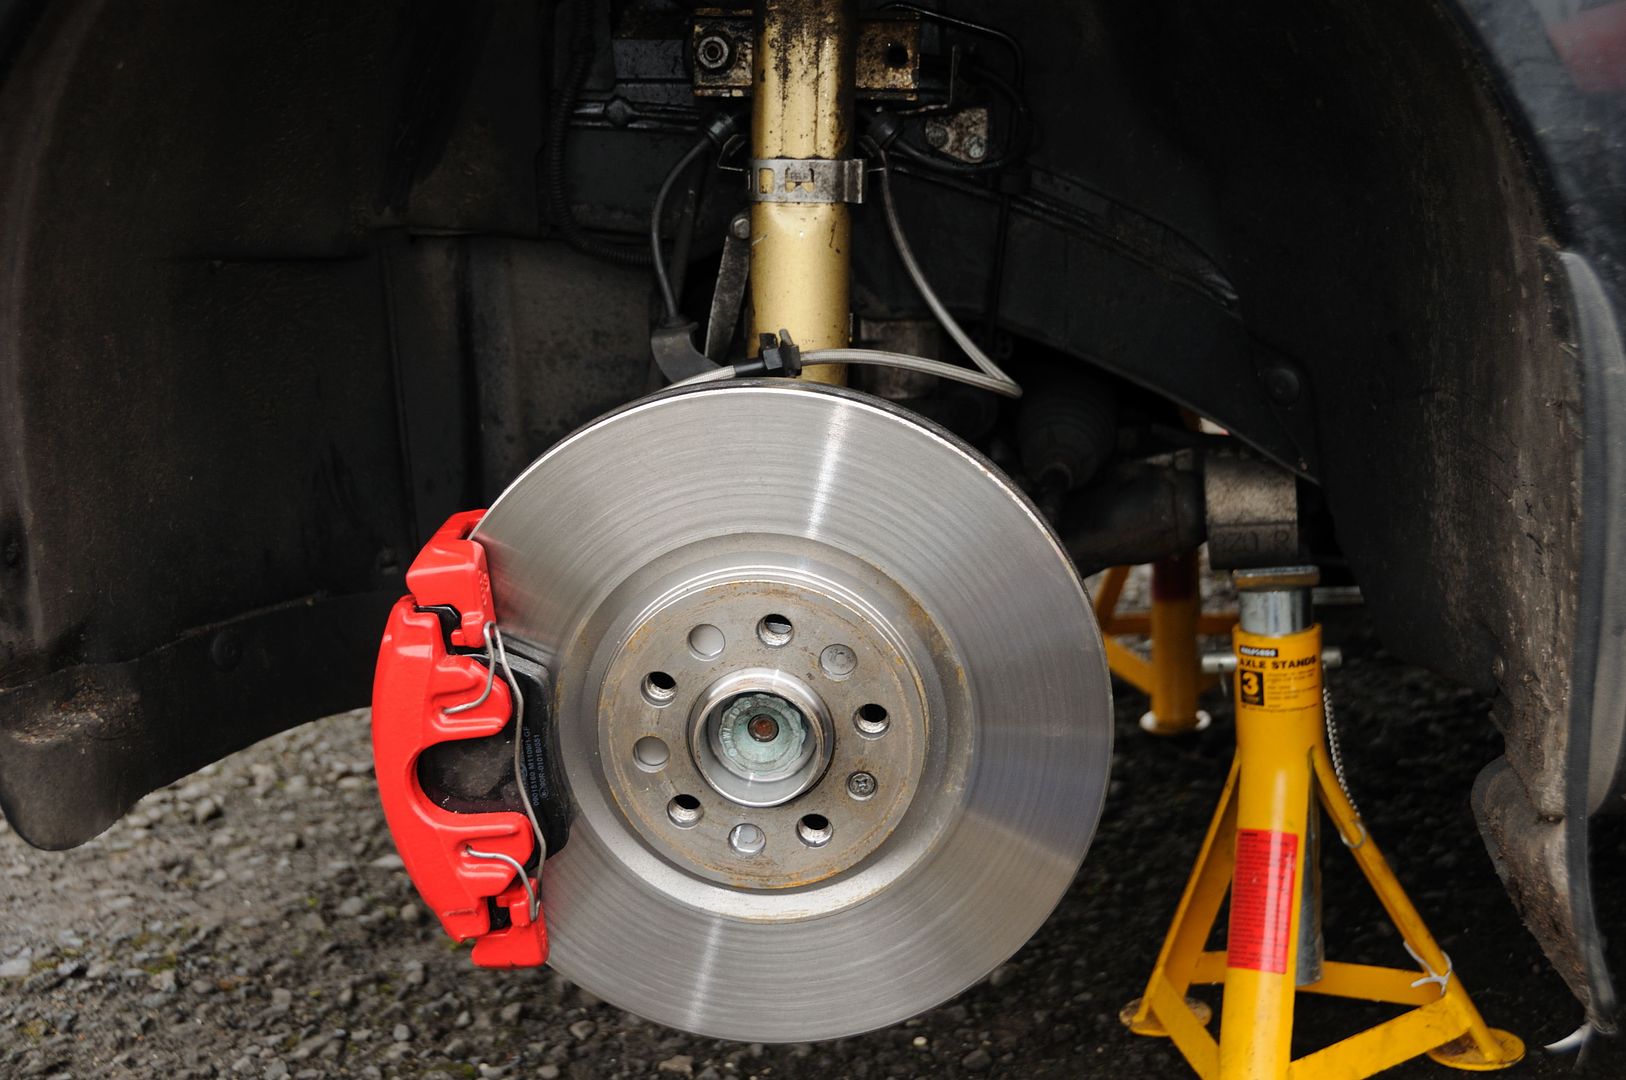
Attach the new splash shield and brake disc, then put the new caliper on to the hub housing. Attach the brake line to the calpier and then re-clip the hose into the brackets around the damper, so that kinking is minimised.
Re-attach the (modified) brake union bracket and wipe everything down with a rag. Double check all the bolts and nuts you have undone, to see that they are tight and sound.
At this point, you're pretty much done - bleed the brakes (start with the nearside) until you get a solid pedal, re-attahc the wheels and lower the car.
Once the tyres are on terra firma again, don't forget to torque up the drive shaft nuts, as well as the wheel bolts.
Clean everything down to remove any brake fluid and you're done - enjoy your new, REALLY powerfull brakes!!
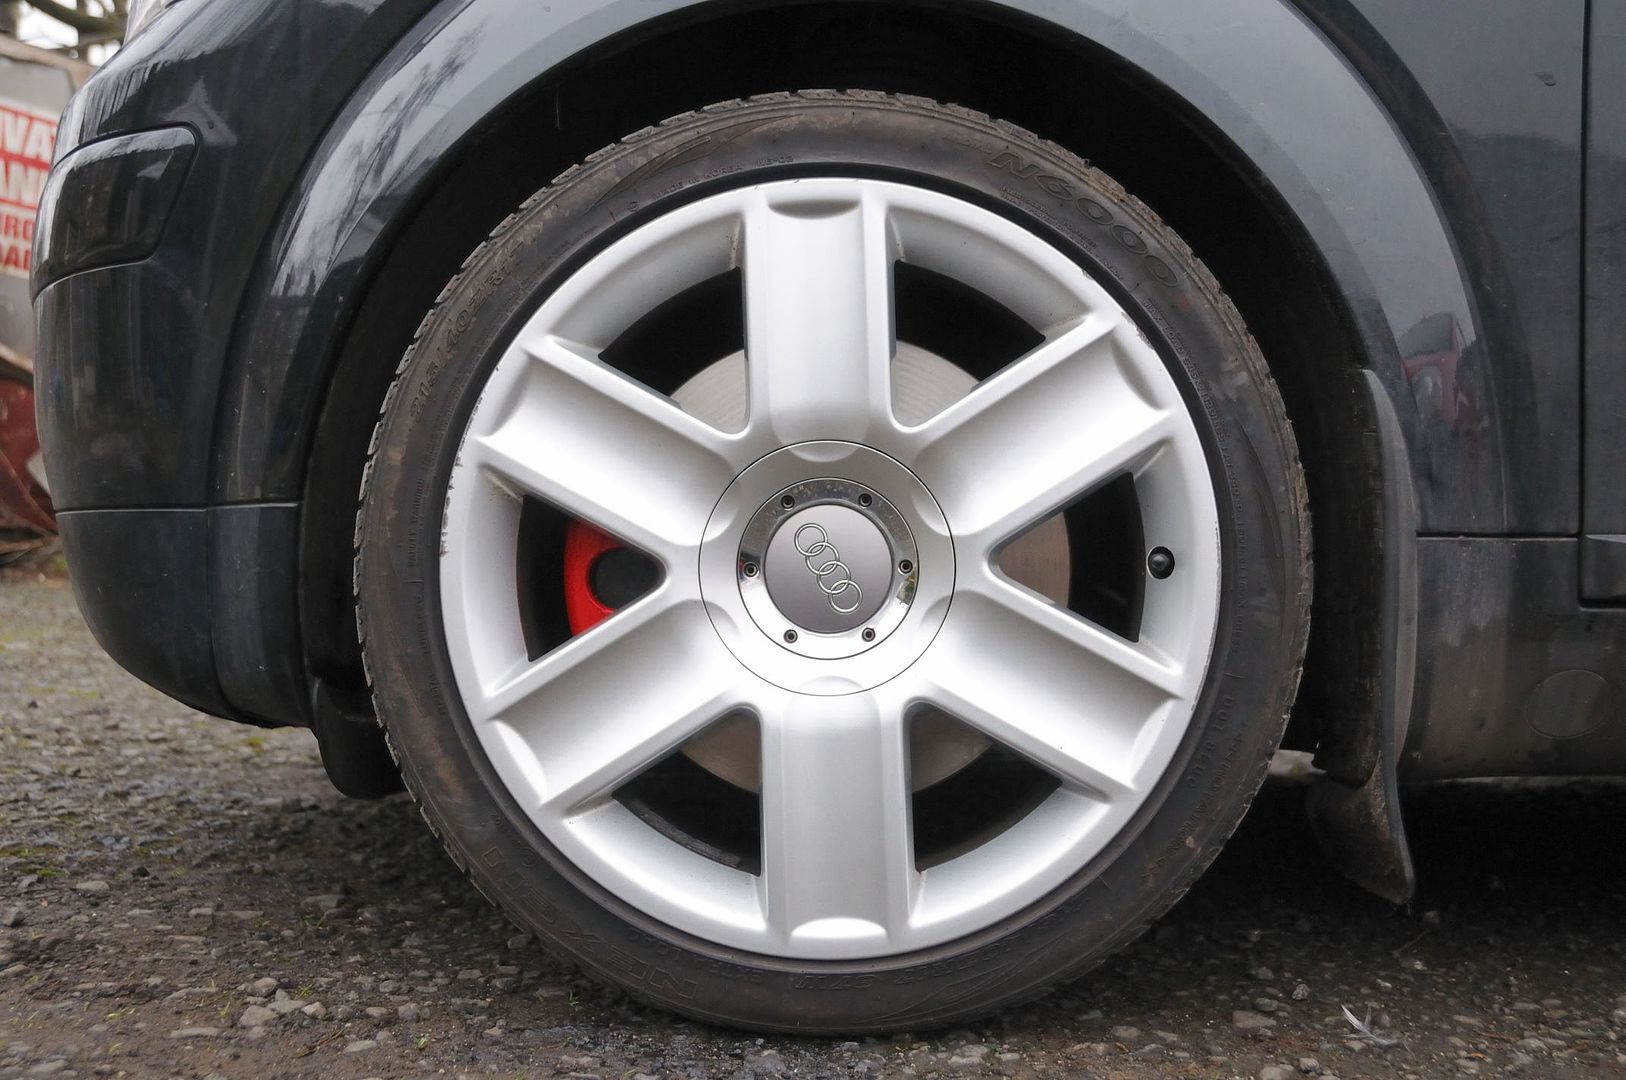
Pictures of the final installation will come tomorrow, after I've replaced the tie rod end nut!
Cheers,
Mike
")