Let’s talk about galvanic corrosion.

Little Dog

A2OC Donor
European-Union
I invite this conversation from a position of needing to know rather than knowing. Years ago I would have cited rust as my car DIY nemesis. However I got good at rust; faced with oxy it melts.
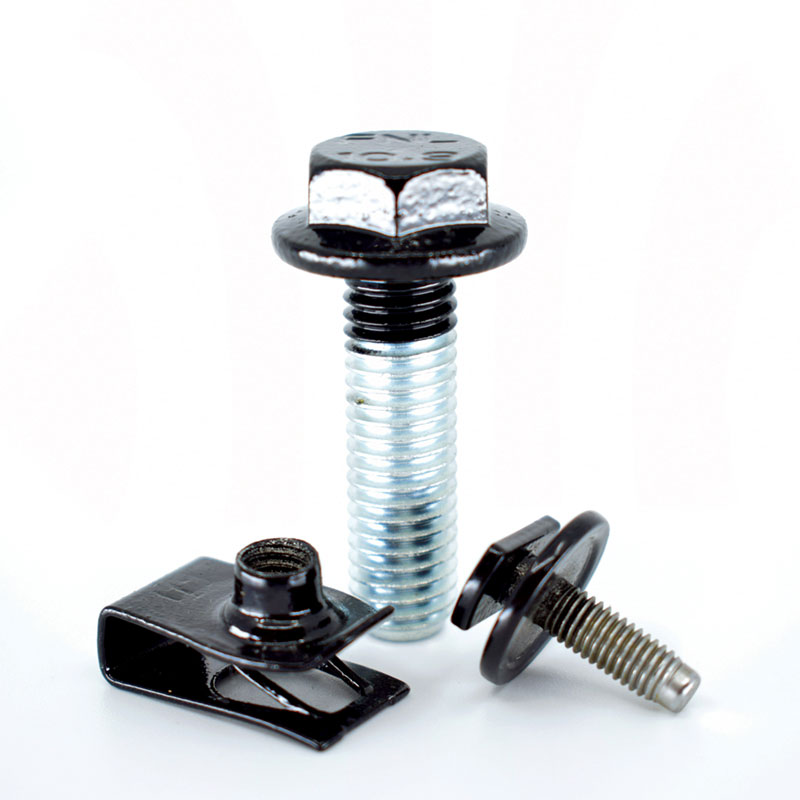
Put aluminium next to steel and galvanic corrosion occurs. The resulting aluminium oxide has more volume than aluminium so it applies pressure, it is abrasive too so penetrating oils make no difference and based on my experience heat to the melting point of steel will not shift it either.
I had a simple preventative solution, put a barrier between the steel and aluminium, this worked with my A2 heat shields but recent findings changed my view of this fix.

IMG_0952.jpeg


Shame I started to clean it up but between the two steel studs was extensive galvanic corrosion of aluminium. Based on my existing understanding I would expect that component to meet with steel. No, it meets with aluminium so the corrosion must be caused by the more remote steel studs.
Galvanic corrosion and how to prevent; discuss.
 
Recent experience of removing the suspension arm pivot bolt, as many others have found illustrates your points on,
1) the oxide has a higher volume than the aluminium.
2) the oxide is harder than the aluminium
3) penetrating oil and heat have little affect on easing the joint.
Audi used to use the coating which we now believe is banned. They must be using a substitute as I am sure direct Aluminium to steel contact is still to be avoided.
The severity of the galvanic action is greatly impacted by the presence of the electrolyte, in our case water and worse, salt water. Preventing water settling on vulnerable points is a practical step we can take
Blind bolt holes therefore do not present too much of a problem, through holes (such as the suspension arm pivot into the console, are a prime candidate. I intend to ‘plug’ the back of the hole when reassembled
 
Unfortunately sacrificial zinc or magnesium anodes on our cars would not work due limited reach the only way to partially slow down galvanic corrosion is to put some barrier or break the connection between the two affecting metals to idealy stop or slow down the flow of electrons between them. The cheapest easiest method I do for last 20 years is to cover all the affected fasteners I ever taken of with either thin film of special solutions or cheap copper, aluminum paste which will partially break the "electrical current" and slow down inevitable outcome. It's simple and it works. This is not “done and forget" method the key is to keep an eye on things so you can act before it's way too late. Thing to remember according vw manuals dacromet which quite a lot of bolts are coated with on A2s is reacting with copper so copper grease shouldn't be used because it'll do the opossite reaction.
 
Recent experience of removing the suspension arm pivot bolt, as many others have found illustrates your points on,
1) the oxide has a higher volume than the aluminium.
2) the oxide is harder than the aluminium
3) penetrating oil and heat have little affect on easing the joint.
Audi used to use the coating which we now believe is banned. They must be using a substitute as I am sure direct Aluminium to steel contact is still to be avoided.
The severity of the galvanic action is greatly impacted by the presence of the electrolyte, in our case water and worse, salt water. Preventing water settling on vulnerable points is a practical step we can take
Blind bolt holes therefore do not present too much of a problem, through holes (such as the suspension arm pivot into the console, are a prime candidate. I intend to ‘plug’ the back of the hole when reassembled
I noticed on other people posts of their broken snapped pivot bolts they tend to corrode on the upper parts close to the hole where moisture from wheels accumulate all the time so after I replaced the wishbones I plugged the holes for pivot bolt on wishone console with aluminum grease and tight 3d printed plastic plug which hopefully stop any moisture getting through.
 
Worth a read:
Mac.
 
Worth a read:
Mac.
Absolutely amazing stuff but unfortunately not for us I'm afraid. Same as dacromet right after application on metal it needs to be baked in the oven at around 300C.
 
I suspect @Sootywg has nailed it. I too think it is all about excluding electrolyte from dissimilar metals.
The component I posted is an under shield support bar. Which collects salty water between two aluminium components, the bar and shield. The only steel present are the two studs, galvanic corrosion between the two studs was extensive.
I have more examples that I will post, but I think keeping electrolyte out is the key.
 
Last edited:
Having removed one of the problematic suspension arm bolts, I acquired an M12x1.5 (not 1.25 as previously posted!) to clean out the thread in the console, knowing there was no way the bolt would go back in easily.
I knew there was alluminium corrosion but was reasonably confident that the threads had not been too damaged when the bolt came out.
The Taper Tap ran into the thread with a little resistance but not excessive. What was pushed out the end as the tap emerged was primarily oxide dust with only a little swarf. the Plug tap behaved much the same. It was interesting to see how much oxide came out. The pic shows approximately 50% of the oxide produced.
Definitely going to plug the open end of the thread with a sealant!
 

Attachments

  • IMG_1355.jpeg
    IMG_1355.jpeg
    2 MB · Views: 56
Last edited:
Having removed one of the problematic suspension arm bolts, I acquired an M12 1.25 to clean out the thread in the console, knowing there was no way the bolt would go back in easily.
I knew there was alluminium corrosion but was reasonably confident that the threads had not been too damaged when the bolt came out.
The Taper Tap ran into the thread with a little resistance but not excessive. What was pushed out the end as the tap emerged was primarily oxide dust with only a little swarf. the Plug tap behaved much the same. It was interesting to see how much oxide came out. The pic shows approximately 50% of the oxide produced.
Definitely going to plug the open end of the thread with a sealant!
Did that come out of just one thread?

Edit; It looks like a very good example of electrolyte ingress at the open end of the female thread. Would you still have and could you post a picture of the bolt that came out please? I don’t have a current good example.

When I reassembled my front suspension I was not fully aware of what I was dealing with. However, all components were new so I assembled them dry except for the rear bush. I then sealed the end of the female thread with engine silicone.
 
Last edited:
Did that come out of just one thread?

Edit; It looks like a very good example of electrolyte ingress at the open end of the female thread. Would you still have and could you post a picture of the bolt that came out please? I don’t have a current good example.

When I reassembled my front suspension I was not fully aware of what I was dealing with. However, all components were new so I assembled them dry except for the rear bush. I then sealed the end of the female thread with engine silicone.
Yes just the one, it is at least a 4cm long thread though!
I posted this pic on my thread on failed suspension arm, I don’t think I had wire brushed it at this point.
 

Attachments

  • IMG_1348.jpeg
    IMG_1348.jpeg
    1.5 MB · Views: 47
IMG_7424.jpeg
This was one of mine I removed recently, had to force it the whole way out with a breaker bar, I’m surprised it didn’t snap. Note the aluminium seized in the thread near the end, which was dragged through every female thread on the console on its way out.
The picture is after cleaning it up a bit
 
Unfortunately sacrificial zinc or magnesium anodes on our cars would not work due limited reach the only way to partially slow down galvanic corrosion is to put some barrier or break the connection between the two affecting metals to idealy stop or slow down the flow of electrons between them. The cheapest easiest method I do for last 20 years is to cover all the affected fasteners I ever taken of with either thin film of special solutions or cheap copper, aluminum paste which will partially break the "electrical current" and slow down inevitable outcome. It's simple and it works. This is not “done and forget" method the key is to keep an eye on things so you can act before it's way too late. Thing to remember according vw manuals dacromet which quite a lot of bolts are coated with on A2s is reacting with copper so copper grease shouldn't be used because it'll do the opossite reaction.
Would sacrificial anodes local to problem areas be helpful though? One on each of the aluminium subframe consoles near the wishbone bolts for example?

Also I’ve been using aluminium grease on my cars, copper is further from aluminium than steel is galvanic series wise so I wouldn’t use copper grease in aluminium threads, but I assumed aluminium grease would be ok.
If it’s reacting with the Dachromet however, then maybe this isn’t the case 😬
 
View attachment 119744This was one of mine I removed recently, had to force it the whole way out with a breaker bar, I’m surprised it didn’t snap. Note the aluminium seized in the thread near the end, which was dragged through every female thread on the console on its way out.
The picture is after cleaning it up a bit
Oooh! that is a bad one. Just like mine were, I had no usable female thread left. I also found the bushes were seized with aluminium oxide. Cost me for two consoles.
It looks like what I expected from @Sootywg but his bolt looks quite good.
 
Would sacrificial anodes local to problem areas be helpful though? One on each of the aluminium subframe consoles near the wishbone bolts for example?

Also I’ve been using aluminium grease on my cars, copper is further from aluminium than steel is galvanic series wise so I wouldn’t use copper grease in aluminium threads, but I assumed aluminium grease would be ok.
If it’s reacting with the Dachromet however, then maybe this isn’t the case 😬
I don’t know the answer to this question but my understanding is that the zinc in the coating of fasteners provides the sacrificial metal. That is the reason it is thought Audi advise the replacement of 10.9 grade screws. Link to your thread for others to refer to, https://www.a2oc.net/community/index.php?threads/dachromet-coating-and-reusing-fasteners.54619/
The Dachromet on your screw looks more degraded compared to @Sootywg s screw which is still quite green.
 
We used to do HGV conversions to run on diesel & CNG natural gas. The CNG tanks were held in place with aluminium blocks at each end but had to allow for movement when filling @ 200 bar. The aluminium blocks were bolted in place with either 14 of 16 mm diameter steel bolts. After 3 years on the road there was no way they would come out. You could try all methods but only cutting them off and starting again worked.
 
View attachment 119744This was one of mine I removed recently, had to force it the whole way out with a breaker bar, I’m surprised it didn’t snap. Note the aluminium seized in the thread near the end, which was dragged through every female thread on the console on its way out.
The picture is after cleaning it up a bit
I guess that left behind a very damaged female thread in the console.
I am hoping mine is not compromised, however the more I read on here the more concerned I get about using the original bolt in the original console.
I will try and take a picture of the female thread to convince me I do not need to replace the console.

As a side note: last Saturday I ordered Front brake splash guards and a steering rack gaiter from ‘onlinecarparts’
and on Sunday I ordered two lower suspension arms from AutoDoc. The suspension arms arrived this morning, well ahead of my expectation.

Now for the challenge of getting the new arm into the rear bush before putting in the dreaded bolt (alluminium grease on order)
I am still looking through the forum for the correct torque plus angle for tightening the arm bolt. Do you guys know?

Geoff
 
@Sootywg the bolt is difficult to pick out in the manual. If it is M12 1.5 by 100mm then the torque is a big one 70 Nm + 90 degrees.

Edit, I see the tap you used was M12 1.25. I don’t right now have access to my manual. It could be a typo on my part on the bolt size. Wait until somebody else comments re the torque. I will check again tomorrow.

In my case there was very little female thread left. My bolt was the same as the one @Howey posted. I had to fight it all the way out with a 6 sided socket and a long breaker.
 
Last edited:
One more example of issues with the long screw into the wishbone consoles: https://www.a2oc.net/community/inde...ing-a-badly-rusted-wishbone.42069/post-380728
Some of you might remember I put in helicoil type threads.
Interesting topic about galvanic corrosion here, although I have very little knowledge to contribute with.
Anybody contemplating coiling their consoles needs to read this thread by Joga. The pillar drill is not a nice to have it is essential for M12 coils.
The only alternative that I can think of is to hand ream the old thread away up to coil tap drill OD. That way working by hand you can keep metal removal under control and straight.
 
Back
Top