Open to the floor

  • Thread starter Deleted member 20348
  • Start date
I think if @rotifer methodical approach can’t get to the bottom of this, then there’s no hope for the rest of us
I’ll watch with interest, I won’t be looking at mine for a while longer I feel, got several more serious jobs to do before that gets to the top of the list…
 
What is the giveaway in the pictures for the engine having ran hot in the past?
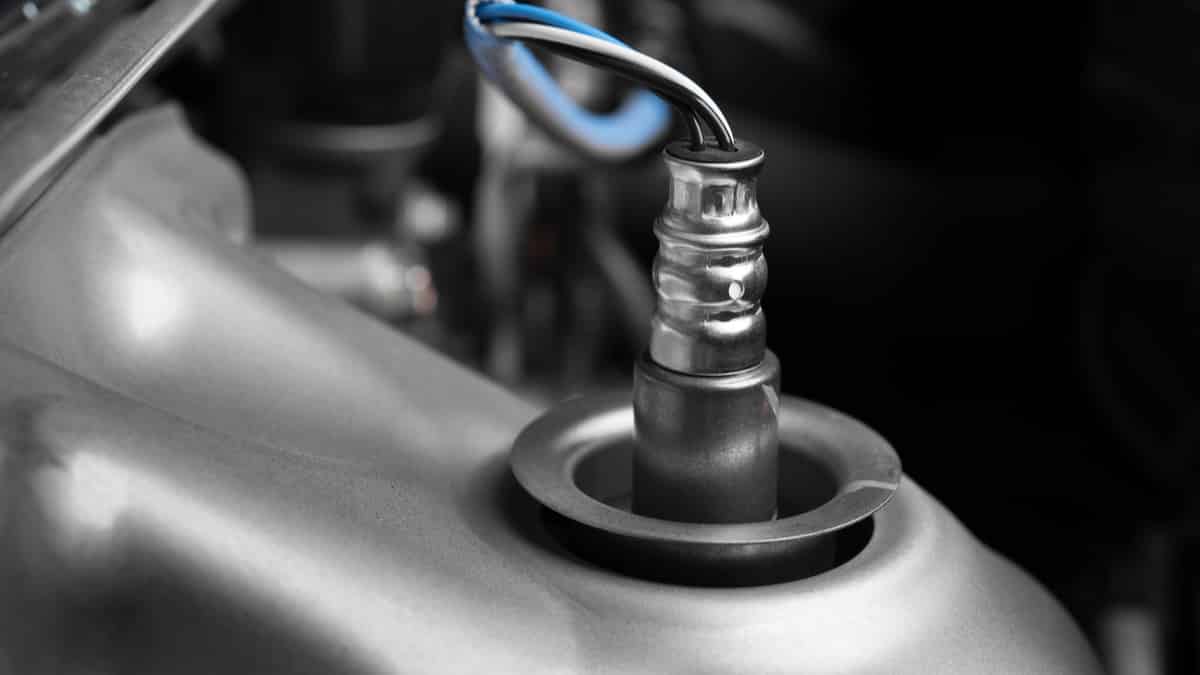
It was the view through the oil sensor hole. My immediate thought was it looks like there’s been a fire in there. That isn’t possible, it is the colour of oil deposits that don’t look particularly liquid, almost baked on. that made me think the engine has been run far too hot. Also the staining on the white engine silicone is darker than anything I've seen.
I’ve had a couple of petrol engines apart recently that have been driven hard. The oil still looked like oil, it wetted components and could be wiped off. Not sticky or baked looking, unfortunately no pictures.

This is an internet picture of baked oil, it is a worse case of what I thought I was looking at:

Baked oil.jpg
 
Adjusted the photo and zoomed in.
20240225_145121.jpg

Cam cover closer inspection
20240222_130443.jpg

Rockers
20240222_130250.jpg
 
It was the view through the oil sensor hole. My immediate thought was it looks like there’s been a fire in there. That isn’t possible, it is the colour of oil deposits that don’t look particularly liquid, almost baked on. that made me think the engine has been run far too hot. Also the staining on the white engine silicone is darker than anything I've seen.
I’ve had a couple of petrol engines apart recently that have been driven hard. The oil still looked like oil, it wetted components and could be wiped off. Not sticky or baked looking, unfortunately no pictures.

This is an internet picture of baked oil, it is a worse case of what I thought I was looking at:

View attachment 120034
Worth remembering that not all oils are the same. The temperature at which an oil breaks down is very much related to the quality of the oil stock it's made from. Some of what you see could be the result of low quality oil, and extended service intervals, I suspect.
Mac.
 
-Charcoal Evap Valve-​

20240301_205136.jpg

The car was scanned with VCDS and there was another fault code- O2 sensor short

A best guess scenario

The ECU was adjusting the short term fuel trim to maintain the O2 sensor reading which can be see by you or I as a steady tick on our rev-counters. The needle on my car had a low engine tick over and was wandering up and down, but why?
False air perhaps, in other words unexpected excess air entering the intake manifold.
The car appeared to be running ok but the engine got hot fast and ran hotter than I expected. Up till now only had it running for any length of time on 3 occasions so purely going on a gut instinct.

I tested the charcoal valve first.
The video is how the car ran after the work was done.
(Exclamation mark = empty brake reservoir).

Needle is steady and tick over, not totally, but better, still room for improvement. Up to this point only the old engine parts are being used (excluding seals).
 
Last edited by a moderator:
-Charcoal evap valve-
20240301_202857.jpg
20240301_202834.jpg
20240301_202814.jpg


I did some basic tests on charcoal evap system starting with the ECU activated valve. The hose was removed from the left side of the valve (see image above), then a vac pump was fitted to valve and a vacuum was applied followed by pressure being applied. Conclusion was the valve was air tight when not energised via the ECU signal.

With the vac pump unplugged from the valve the engine was started, the valve opened and air was drawn in. I put my thumb over the end of the pipe to confirm there was suction. The valve was working as it should.

Once again using the pump on the inbound (to engine) hose from the charcoal canister, vacuum was applied. The dial indicator showed zero, air was flowing freely through the canister.
I noticed the years of petrol fumes passing through the hoses had hardened the rubber and the fittings were loose. A 2cm section was removed off the end of each hose to improve the seal, this was done along the entire line from the canister to the intake.
20240301_203126.jpg


I should have stopped fixing stuff there and then but I wasn't thinking and went ahead with removing the brake booster rubber grommet and vac line inspected them for damage and cleaned with silicon grease before refitting. The MAP sensor also got treated to two fresh o-rings.

All fault codes were erased and the car started, you know the rest it's in the video footage.

I'm not calling this job done as my earlier diagnosis overlooked the car was not idling all the time therefore the intermittent fault could have been related to the engine being revved. I purposefully left that bit of information out so as not confuse things at such an early stage.
Going forwards the engine can now be put under load for the next part of testing.
 
Last edited by a moderator:
-Charcoal evap valve-​

Hi all, I've still to find the time to write about the engine and it's seals.
EDIT: (29/03/24)
Engine and Seals
This is a preview picture of the areas where vacuum/false air in a 1.4 petrol engine could be found
20240225_142809.jpg
 
Last edited by a moderator:
Hi Indi,
No nothing like that at all, it ran without any adaptation from the first turn of the key. Are you suggesting I run adaptations?
:)
I'm fairly useless at VCDS
 
Hi Indi,
No nothing like that at all, it ran without any adaptation from the first turn of the key. Are you suggesting I run adaptations?
:)
I'm fairly useless at VCDS
yeah I think you might be supposed to run adaption any time you remove the throttle body or egr valve respectively, but I would say if you’ve been mixing and matching between the engines then it’s definitely worth doing (especially if it’s idling slightly weird)

It’s pretty straightforward, chose the engine module in VCDS, select ‘basic settings’ from the buttons in the right hand side, type in the group number and hit go. EGR is group 074, and throttle body is group 060. It will say ‘adp. Run’ (or something similar) and then change to ‘Adp.OK’ when it’s done
 
I ran the adaptations and that's made a difference, cheers @Indi

The lambda sensor bank 1 and (edit) sensor one and two voltage values move as the engine rev range alters. (above edits corrected my error spotted by @PlasticMac, thank you Mac :) )
20240302_145056-COLLAGE.jpg

Edit
With the engine warmed up the accelerator has been pressed multiple times and held it at a constant 2000rpm and no fault codes returned.
Wiki edit posted on (03/03/24)

-Injectors-
Yet more seal arrived today, these are for the fuel injectors.
20240302_115540.jpg

O-rings & filter baskets
20240302_153443.jpg
Fuel rail schrader valve
20240302_160710.jpg

Injector basket removed
20240302_162245.jpg

Wrong part ordered
20240302_163831.jpg

Safely clamped

20240302_164103.jpg

20240302_175609.jpg
 
Last edited by a moderator:
I ran the adaptations and that's made a difference, cheers @Indi

The lambda sensor bank 1 & 2 voltage values also move when I revv the engine.
View attachment 120087
Yet more seal arrived in the post today for the fuel injectors. View attachment 120088
O-rings & filter baskets
View attachment 120095Fuel rail schrader valve

Edit
With the engine warmed up the accelerator has been pressed multiple times and held it at 2000rpm and I can't get the fault codes to return.
I think you mean Bank 1, Lambda 1 & 2, unless you've sneaked a V8 in there ...
Mac.
 
- Wing Removal -​

Relasing the electrical connection between the door and car is shown a bit lower down.

I would remove the door as suggested by others but it is not a problem if you don't feel confidant doing it.

I left the car door in place when replacing a wing as the garden fence blocked the door from opening fully.

NOTE
The information contained in the post I linked below may help with your decision?

The wing fixings are all in some way covered by something else.

  • Bonnet
  • Front bumper
  • Sill
  • Wheel arch liner
  • The door
It is to be expected that a lot of time will go into the removal of items to get access to the 12 or so wing fixing locations on the wing itself.

Good luck!

Here is a pictorial guide....

20240309_072545.jpg
Nine of the locations

20240305_142206.jpg
Engine bay bonnet removed looking directly from above the wing

20240305_154637.jpg
Close up of body upper mount points on the body shell
20240305_142108.jpg
View directly up under the wing at the alloy mounting leg
20240305_142127.jpg20240305_142148.jpg
Inside the wing (left) and for jamb (right)

20240305_150450.jpg
Similar to racing yatcht sails
20240305_181513.jpg
Beautifully designed car part
 
Last edited by a moderator:
-Body panels-

(08/03/24)

Hello all,

It's been a while but progress has been good, the front end of the car has had parts removed, detail cleaned, rust prevention and then rebuilt.
The front bumper is being painted. The lights, wheel arch liners and undertray have been plastic polished and are ready to be fitted when the time comes.
20240306_080449.jpg


-Body panels, thoughts-
All the hours of maintenance and mechanical repairs are hidden beneath the external skin of the car.

We tend to think that if bodywork is taken care of all the mechanical systems must be well maintained.

Don't be so sure, always check of for service history. This car doesn't have much in the way of service records. Plus the bodywork had poor paint and was dented, the worst of which is the passenger side door, OS wing and front bumper.
The bumper has been prepared for paint and will be sprayed this week.
20240306_150832.jpg


The front wing was swapped for a good second hand part which was minus the laqure peel.
20240306_080525.jpg

20240305_144627.jpg


The passenger front door also taken care of with another second hand part.

20240307_172052-COLLAGE.jpg

20240307_172358.jpg


Getting the exterior in better shape takes a great deal of time. In my case buying replacement panels was the best choice.
You could respray the damage or get dents repaired especially on 'non replacement' areas of the car but I'm certain in my case swapping out was the perfect choice.

Progress is good...

Have a great day!
:) 👍
 
Last edited by a moderator:
-Removal of window frame-

There's one real difficult clip on the rubber seal just above the door lock it is different design to the other few types of clip found on the rubber trim.

20240307_204847.jpg
20240307_204920.jpg


Materials
  • Plumbers putty
  • Number plate adhesive foam on a roll
  • UHU glue
  • Tesa tape
Plus you usual trim tools, various torx and multipoint spine bits.
To take of the inner panel off and make the job simpler and quicker cut the cloth tape holding the wire loom to their plastic holders. The new roll of Tesa cloth tape will be used to reattach the wires to thier holders.

The window frame upper threaded bolt holes are static the lower are designed to be adjustable. The lowers are designed to be turned by hand, clockwise or counter clockwise to adjust their depth. I don't know how they work, when replacing my damaged door I set like for like, measured the old door adjusters with the vernier calipers and transferred that distance to the new door adjusters.

There is a post that talks about how to perform adjustment on these. (unable to find it)

20240307_204744.jpg20240307_204725.jpg20240307_204731.jpg
The lower frame bolts are easy to get at. The upper bolt (x2) access is a little harder as they are in cut outs behind the rubber door seal.

NOTE
Leave door seal in place around the window frame.

If you have removed the window frame you might as well have a look at the door lock.
20240308_145557.jpg

It can be removed with the mounting plastic framework (that clips to the door skin) and all linkages left intact.
But first you are required to access the door handle barrel release screw (in first photo, hidden behind a plastic cap) to retract the barrel locking pin mechanism.
NOTE
When tightening snug down the screw gently.

Remove the barrel from the door and pivot out the door handle. Remove the small screw on the exterior handle mount plate. Undo the two bolts holding the lock mechanism and remove the whole lot at once.
 
Last edited by a moderator:
-Door inner panel repair-

20240307_205052.jpg
NOTE
Some vehicles may not have the three cross head screws.


If you have the materials to repair the inner door panel then the damage done when removing is nothing to worry about.

Materials (a repeat of above)
  • Plumbers putty
  • Number plate adhesive foam on a roll
  • UHU glue
  • Tesa tape
Plus you usual trim tools, various torx and multipoint spine bits to remove and refit.

If you heat the inner panel all around the edge and lift only with your hands then the thin foam strip around the circumference of the door won't be damaged too badly. You can now focus the heat along the light blue line shown in the above photo, don't forget the two extra spots of adhesive along the lower edge of the panel.

To take of the inner panel off and make the job simpler and quicker cut the cloth tape holding the wire looms to their plastic holders.

The new roll of Tesa cloth tape will be used to reattach the wire looms to thier holders on reassembly.

20240307_203428.jpg

The foam roll was built up one layer on top of the other and I stopped at three because it's got less compression than the OEM foam.

The plumbers putty is great because it's waterproof and less sticky compared to tar based products. The putty is used mainly at the hinge side of the door. There you'll find the crusty white solidified old sealant that can be removed with a heat gun and scraper.

NOTE
Put an old bath towel or bed sheet inside the door to catch the debris and prevent the door drains becoming blocked.

UHU Glue is the best way I've found to fix the thin foam along the outer edge because it's a rubber type compound a the looses adhesion before the foam is damaged. It's a sacrificial adhesive. The down side is the foam can easily become unstuck. Once the panel is fitted, no problem.

Run a thin bead of glue and let it go tacky before putting the strip of rubber foam back in its groove.

20240307_203922.jpg
20240307_204937.jpg
You can see the white sealant at 4 o'clock in the thumbnail photo.
Plus there are two spots on the lower edge of the door that requires plumbers putty to be applied.

The blue item in the middle of the picture is the window winder gear.
To release it from the inner panel pinch the 2 fixing tabs with thin pliers on each leg and push gently inwards and they will pop free.


Edit
@Riba water on door card
Get a jug of water and pour it inside the door from one end to the other. Check that all the drains along the lower edge of the door are flowing free. Use a wooden tooth pick/squewer or cotton bud with the cotton end removed to dislodge blockages, repeat this until the flow of water exiting the drain is acceptable.
 
Last edited by a moderator:
-Door Electrical Connector-

If you haven't see one of these door connectors before then the following info may save you some time.

20240308_102102.jpg
Remove footwell trim

20240308_094903.jpg20240308_102443.jpg
Unclip this from the car body by releasing the 4 tabs.

20240308_095643.jpg20240308_095213.jpg
Push the slider in on the top of the connector.
The slider locks the housing to the skin of the car. Therefore when refitting electrical connection into the metal door frame the white markers should be in the misaligned position.

20240308_095632.jpg
Totally unrelated, I mistakenly removed the pin out cover, it clicked back no problem.

20240308_095009.jpg
Press down on the release tab and pull the two connectors apart
 
Last edited by a moderator:
-Body panels-

(08/03/24)

Hello all,

It's been a while but progress has been good, the front end of the car has had parts removed, detail cleaned, rust prevention and then rebuilt.
The front bumper is being painted. The lights, wheel arch liners and undertray have been plastic polished and are ready to be fitted when the time comes.
View attachment 120335

-Body panels, thoughts-
All the hours of maintenance and mechanical repairs are hidden beneath the external skin of the car.

We tend to think that if bodywork is taken care of all the mechanical systems must be well maintained.

Don't be so sure, always check of for service history. This car doesn't have much in the way of service records. Plus the bodywork had poor paint and was dented, the worst of which is the passenger side door, OS wing and front bumper.
The bumper has been prepared for paint and will be sprayed this week.
View attachment 120336

The front wing was swapped for a good second hand part which was minus the laqure peel.
View attachment 120337
View attachment 120339

The passenger front door also taken care of with another second hand part.

View attachment 120340
View attachment 120341

Getting the exterior in better shape takes a great deal of time. In my case buying replacement panels was the best choice.
You could respray the damage or get dents repaired especially on 'non replacement' areas of the car but I'm certain in my case swapping out was the perfect choice.

Progress is good...

Have a great day!
:) 👍
Such a shame about the crack in the windscreen 😣

Both have mine have cracks in the glass where the wiper has snapped down and hit it. The grey one scraped through the MOT, but only just. Both cars always have condensation inside the screen, so it is not ideal at all, but I figure once they are properly insured, the glass can be done on insurance. I want to take the windscreen out on my C1, so I bought a tool for cutting through the glue, but on my first try I was almost immediately chipping the glass. I think it would be hard to do a good job of DIY windscreen replacement, have you ever tried?
 
There are 3 stone chips in the windscreen the crack your seeing is a reflection of next door neighbours telephone line 😄

I tried to remove a windscreen on a previous scrap car with a tool I bought which was a wire with two handles on each end, not surprising I broke the screen. I have removed the glass from a boot lid with the same tool but it was a horendous task, the wrong tool made the job difficult.
 
Last edited by a moderator:
-Headlights-​

20240311_130702-COLLAGE.jpg

The metal cages are easy to remove and refurbish with paint pens.

20240311_101126.jpg
The end cap can be lifted off with a Stanley blade.

20240311_101113.jpg
Once the end cap is removed the internal section and arm can be painted black and the exterior body silver.
The end cap was polished with metal cleaner.

20240311_101528.jpg
The empty bodyshell is ready to be swilled out using water and mild detergent. Shake it from side to side to release all the debris. You can do this until your happy you got all the crud out, give it a swill with tap water a couple of times then use distilled water for the final flush to reduce the chance of water marks and put it somewhere warm to dry.

20240311_101044.jpg
These are the parts removed with some care. The headlight adjuster is a 'twist to release' job and the ball can be a bit tough to get out of the socket.

20240311_133307.png

The part that was painter black is what will be reflected on the rear lens.
So if you painted it blue, yellow or red you would see that colour. Not advisable as you would probably fail the MOT and possibly alter the light output. 😔
 
Last edited by a moderator:
Back
Top